My Griff complete rebuild
(David Hammerton)
I
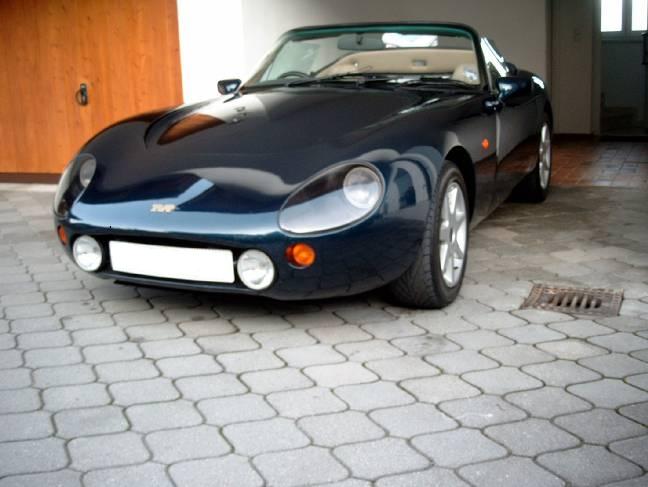
picked up my Griff in March 2004 from a guy in Essex, It’s a 94
Pre-serp 500 with T5 box, I got it for a good price with a leaking
radiator. I purchased a new rad from Peninsula and promptly
fitted, this solved the over heating problem and away I went a happy
bunny J
Due to working abroad I was only in
England for 2 weekends a month, this was agony knowing that my baby was
waiting in the garage at home for me. By July I’d decided I’d had
enough so I took my car out to Germany for a whole month J
Driving this car out there in great weather everyday for that month was
absolutely awesome, an experience I won’t forget and hope to repeat in
the near future. I put over 4000 miles on the car that month
without any problems, which proves how reliable these cars can be.
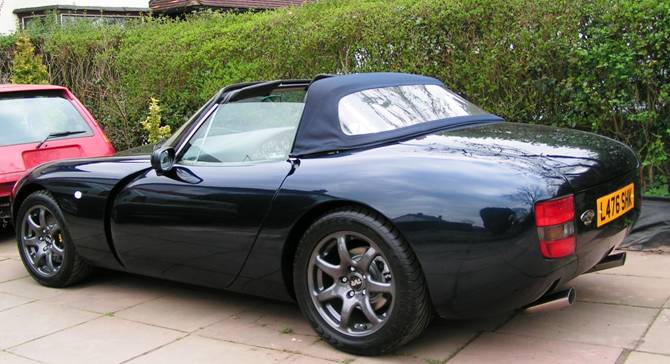
My car outside my apartment in Germany last year (2004)
I
continued to use the car every other weekend when I was home up until
Christmas. On January 5th 2005 I was reading a thread on
Pistonheads about body off chassis restores, knowing that mine had some
rust on the outriggers I was interested in the topic. By the end
of the thread I’d decided to undertake the task, on the 6th of Jan the
project started!! I had no intention of doing this until the day
before!
My plan was to ‘simply’ remove the body,
cleanup and paint the chassis and replace the body. Things don’t
always go to plan!
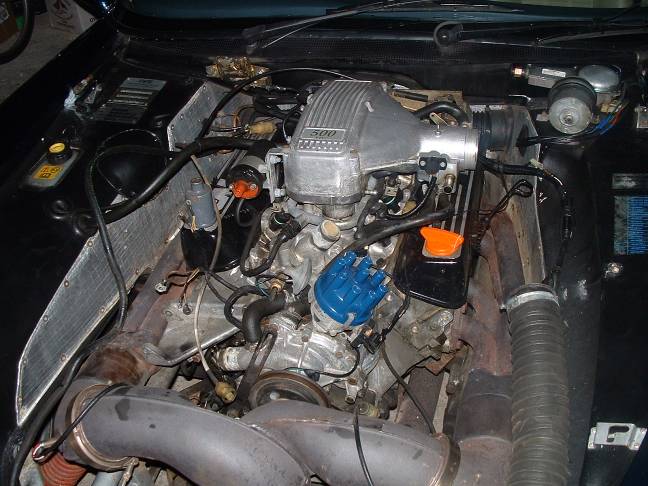
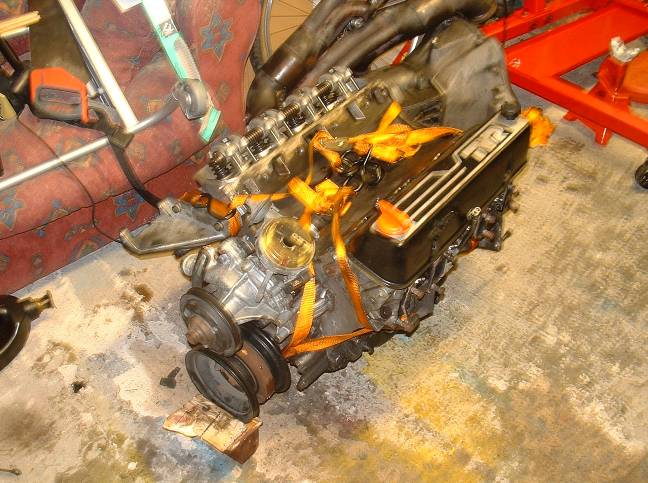
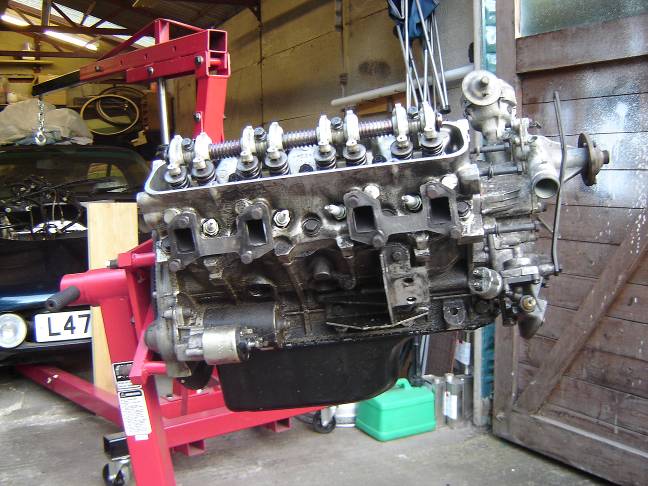
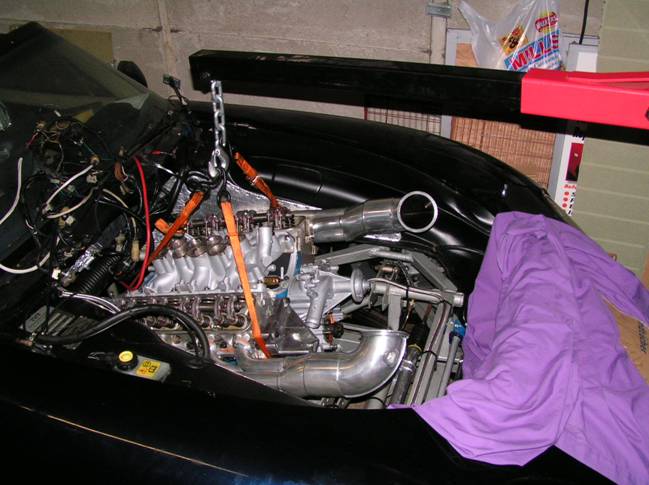
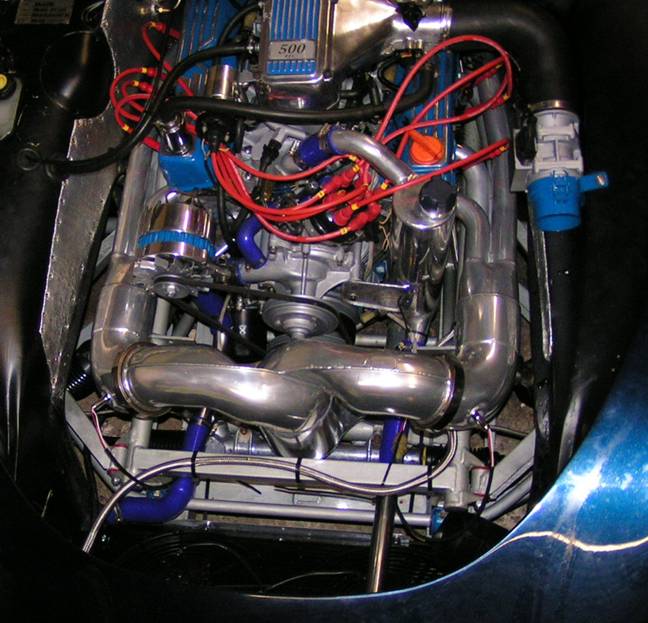
The process started with removing components from the engine bay so that the engine could be lifted out
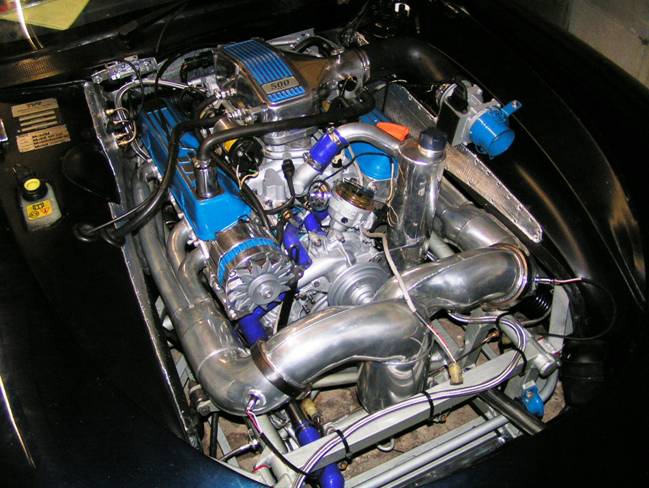
My engine before the strip started

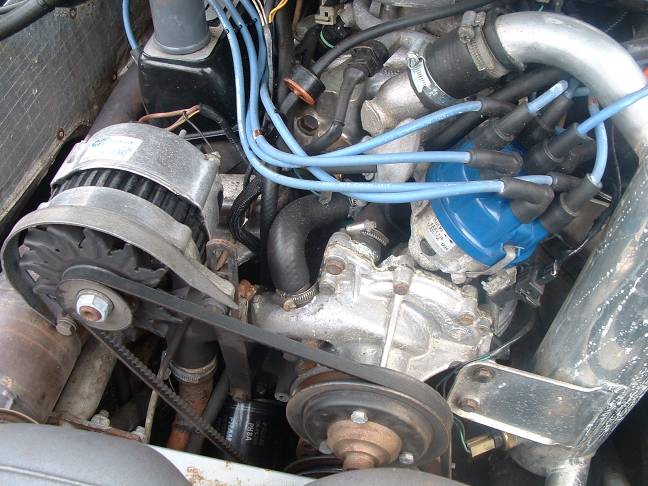
I don’t seem to have any pictures of the engine just before I lifted it out, but here it is partially stripped.
After
disconnecting everything necessary (including the propshaft, exhaust
Y-piece and some other items) it was not too difficult to lift the
engine out, if a little tight (manifolds are a close fit to the
bay). The biggest problems I had were with detaching the engine
and gearbox mounts.
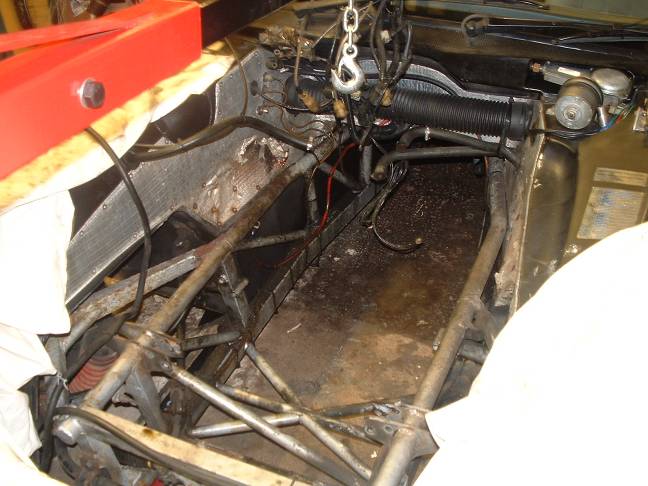
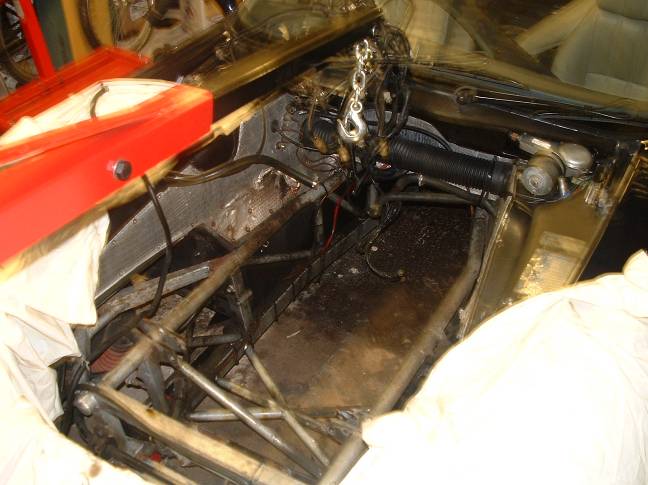
The engine was now out and sitting on my garage floor
Empty engine bay
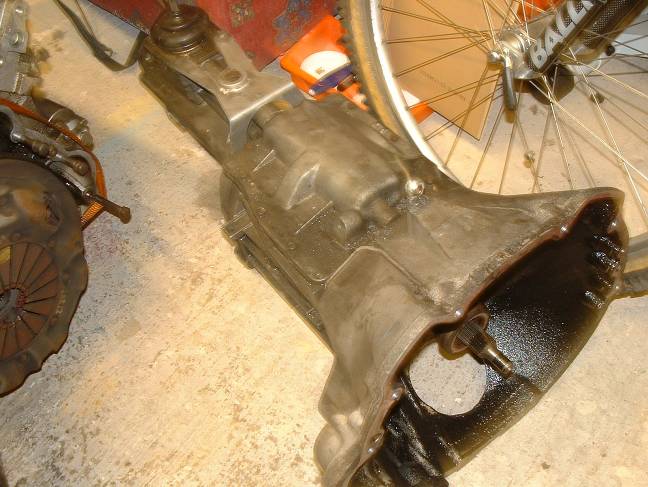
I detached the gearbox from the engine and set these both aside for now (must have been pissed whilst taking this!)
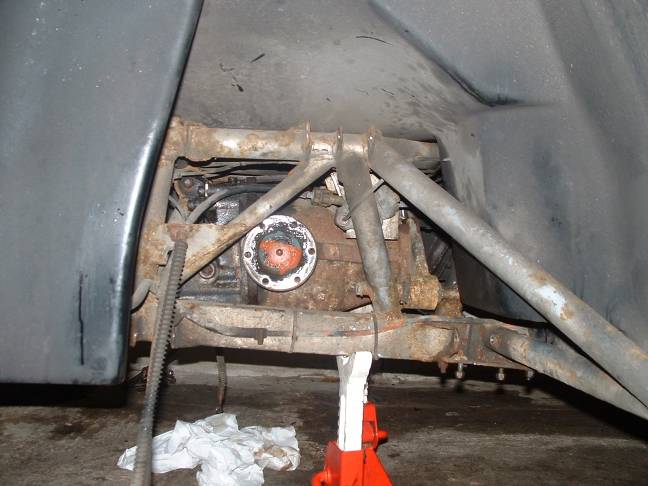
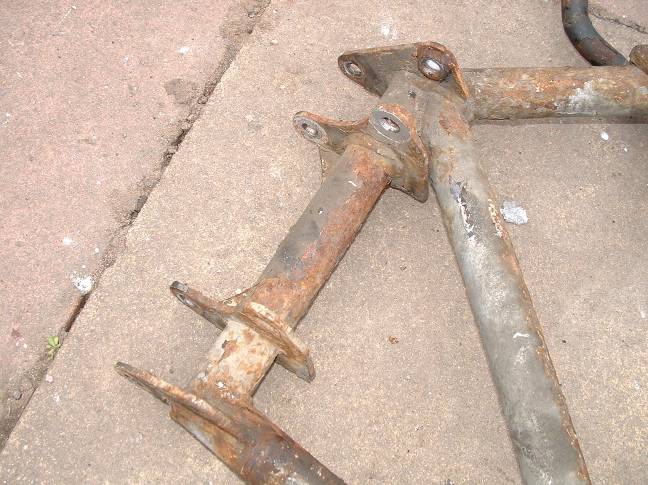
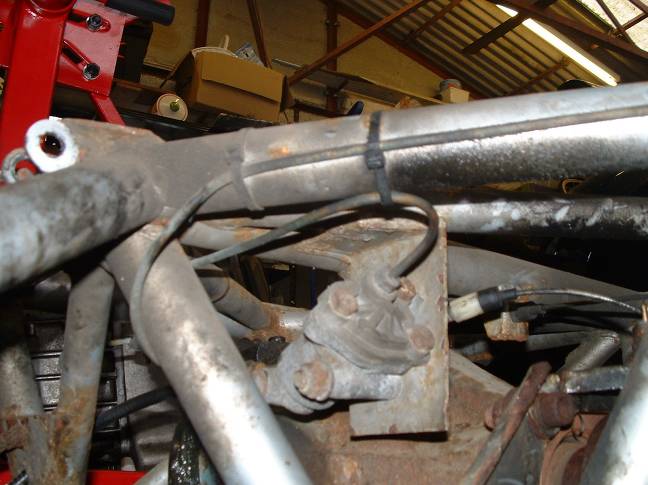
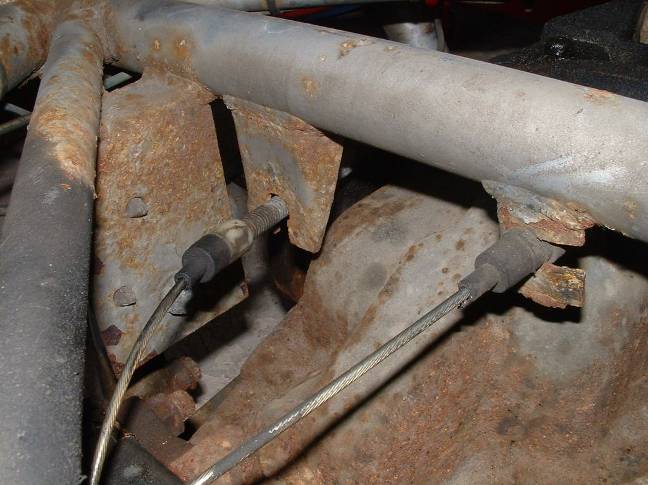
My next step was to start stripping of all of the suspension components
It was a bit rusty under there
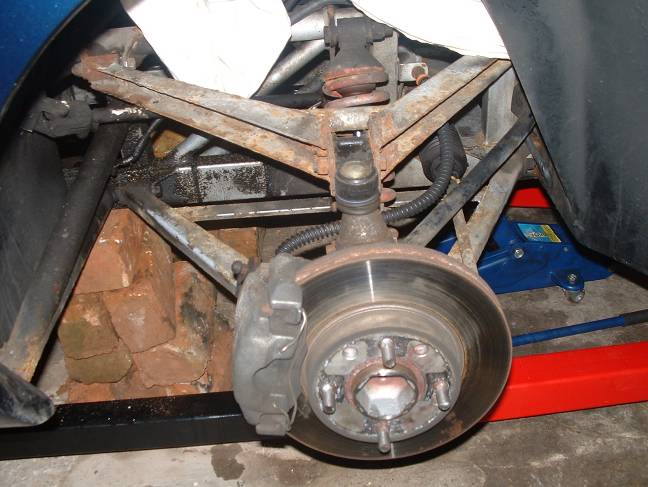
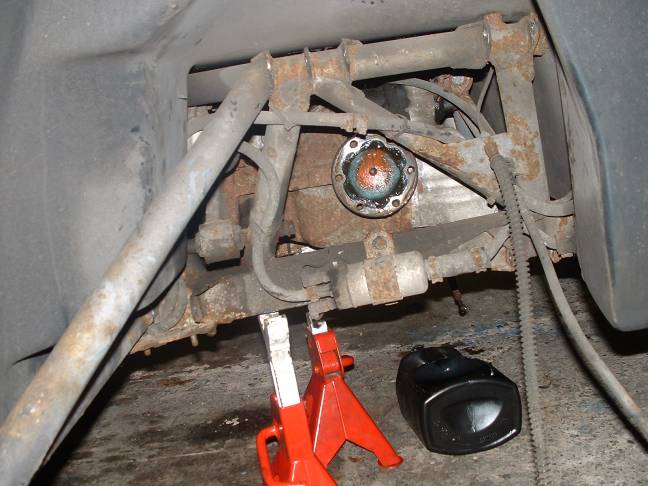
I then removed the drive shafts and the bolts holding the wishbones and continued to dismantle.
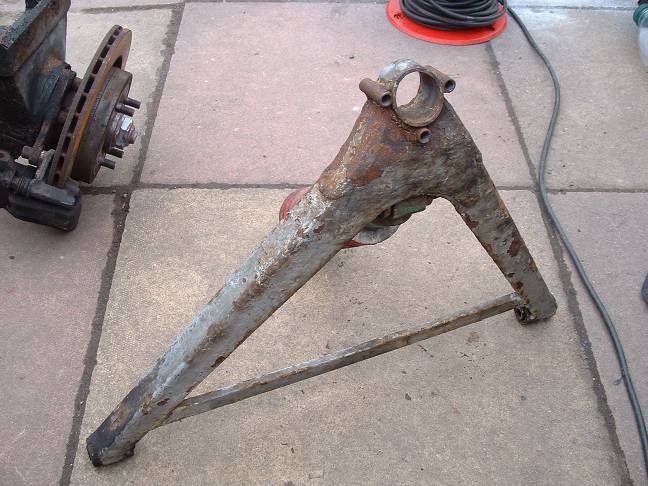
Under RH rear arch pic with the wishbones removed
LH shown below
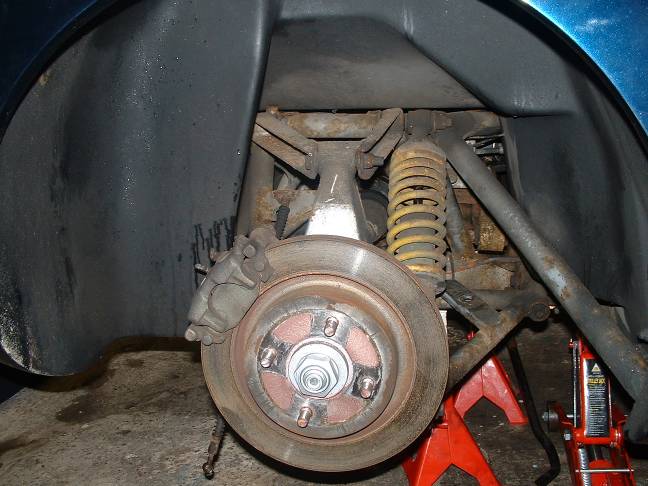
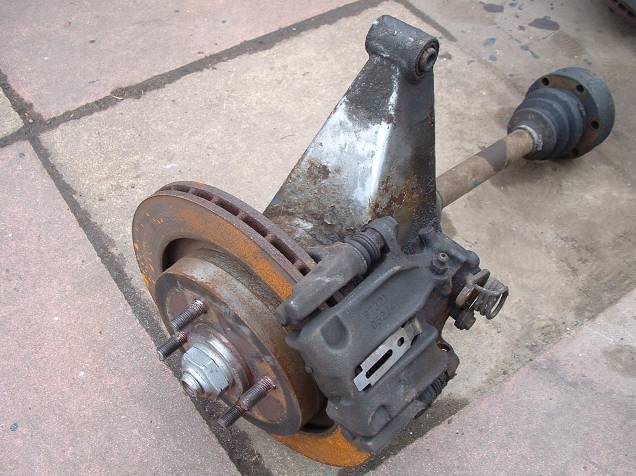
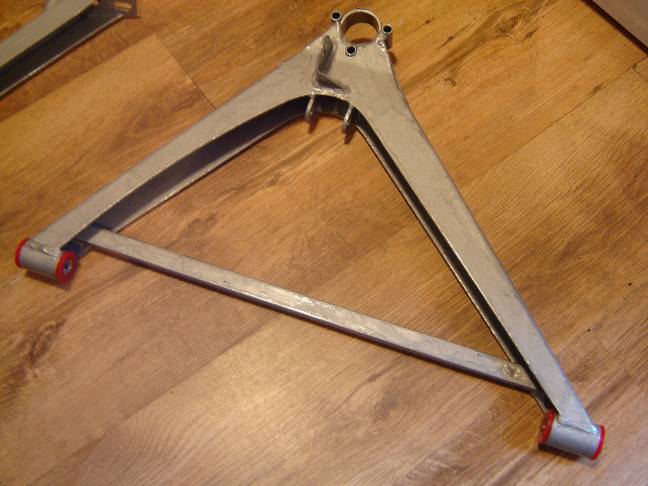
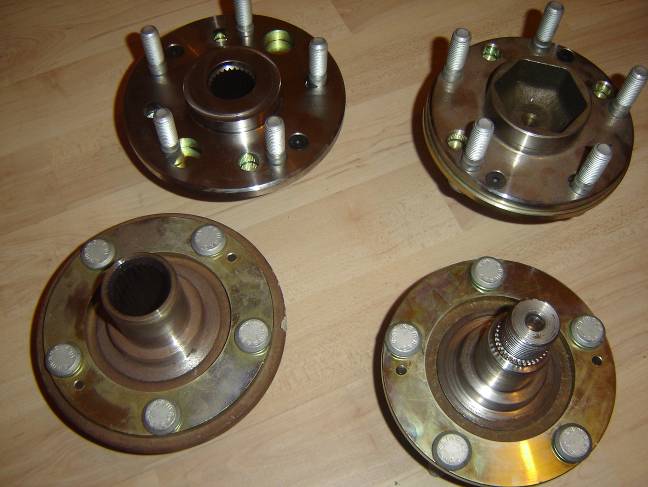
Front right hand

Front hub with brakes
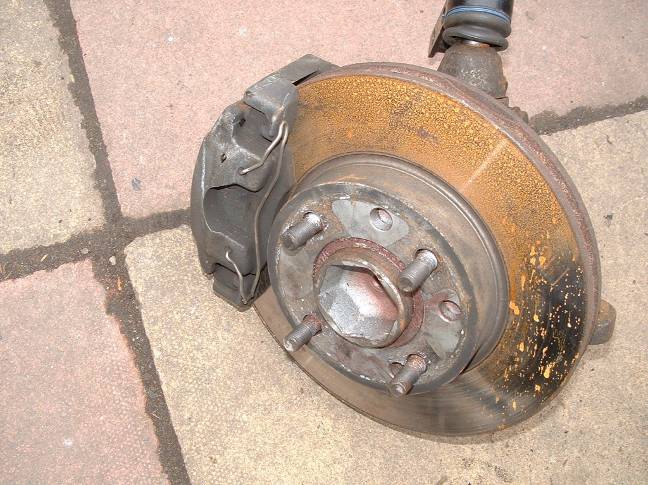
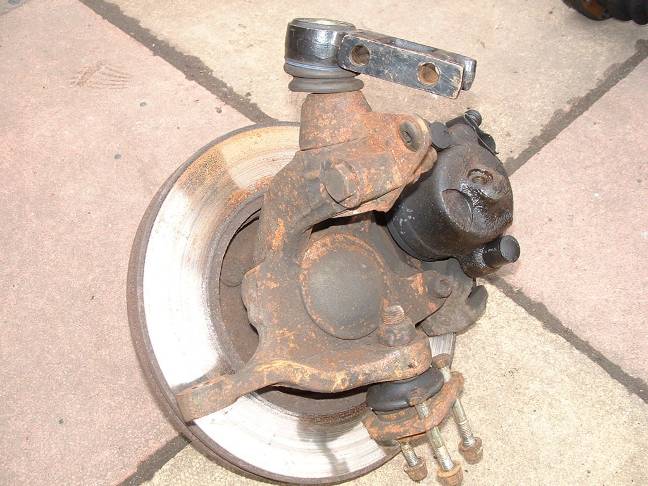
Rear hub with driveshaft and brakes

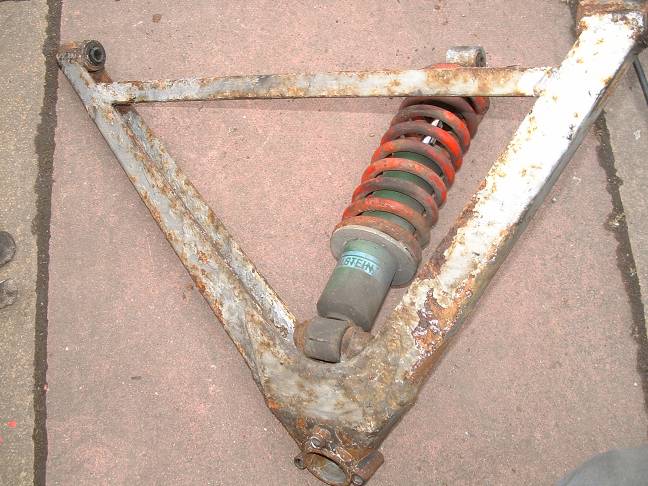
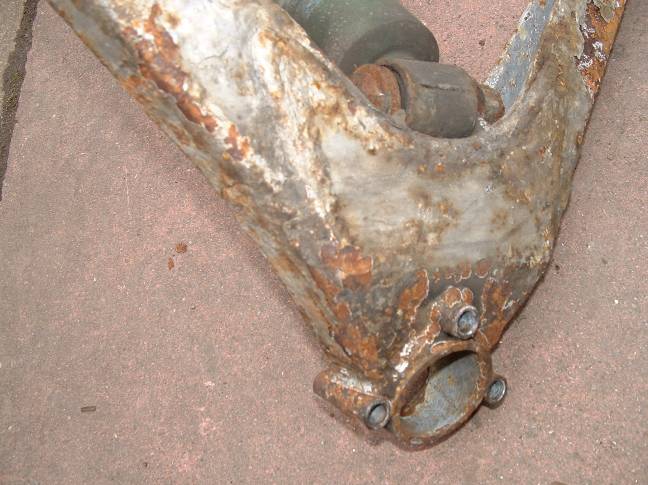
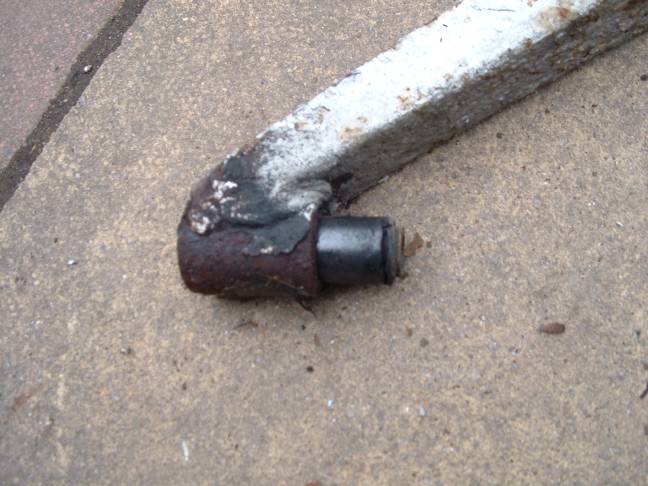
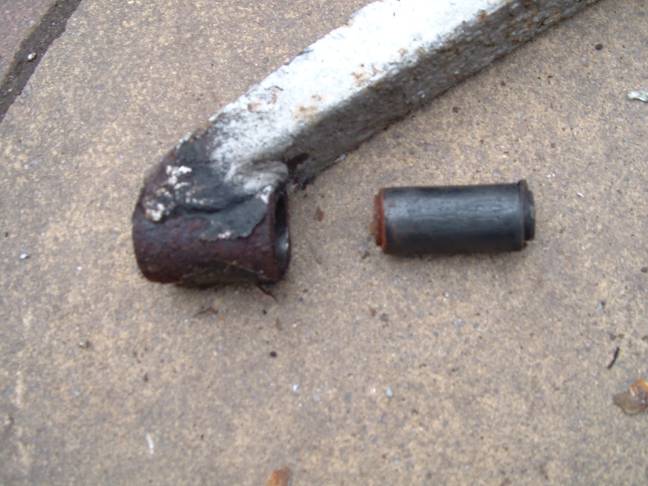
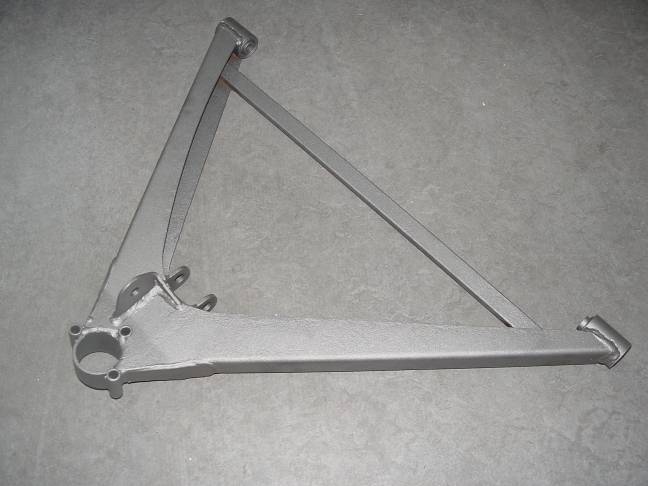
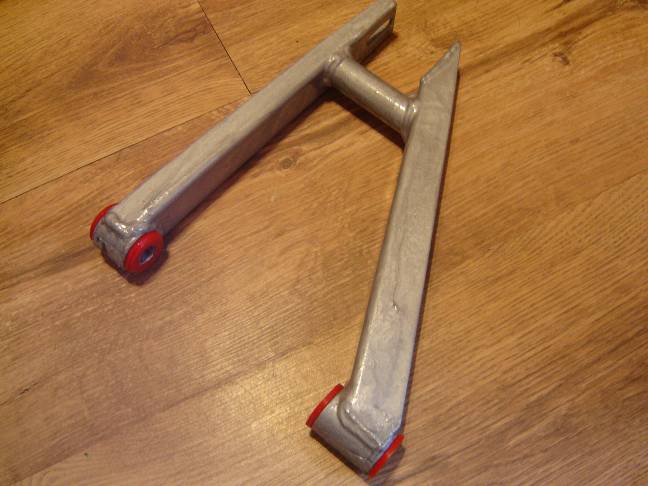
The wishbones were in a bit of a mess, lots of surface rust
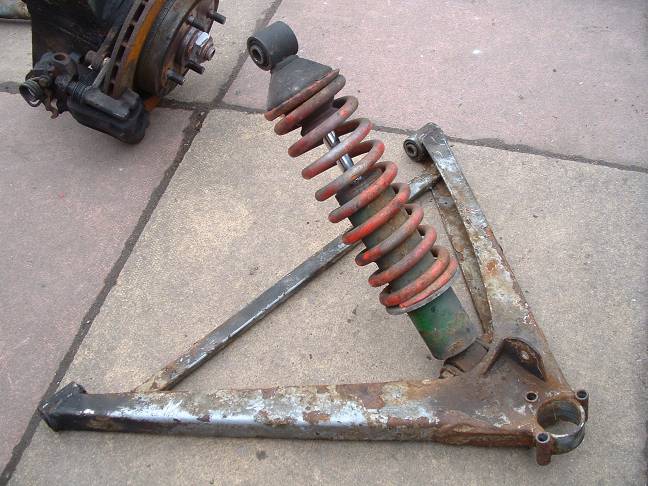
Someone had already treated the front wishbones with what looked like Hammerite, but they made a bad job of it

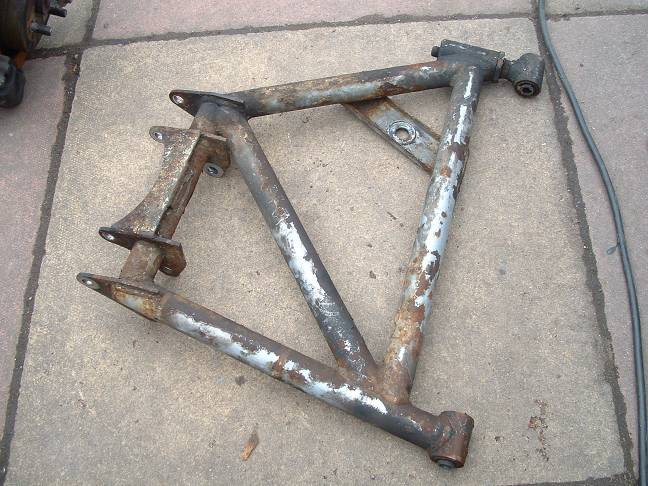
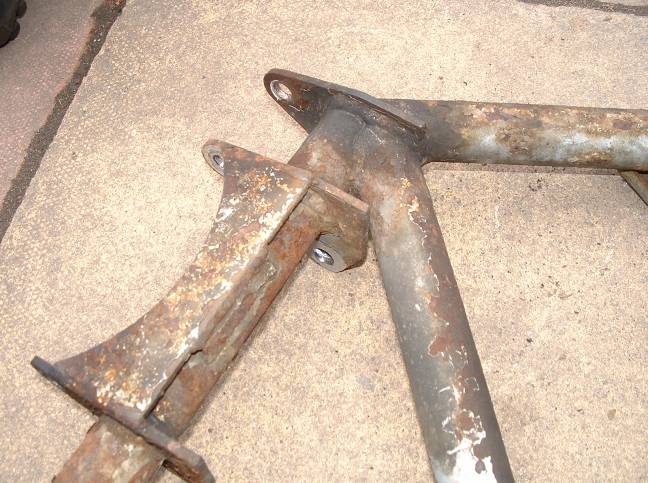
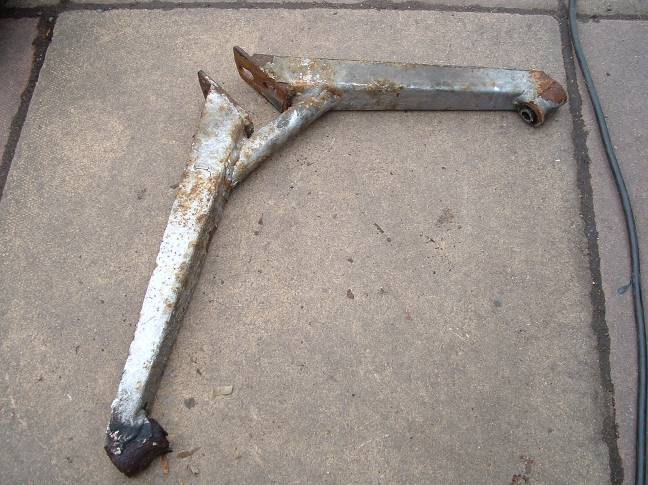
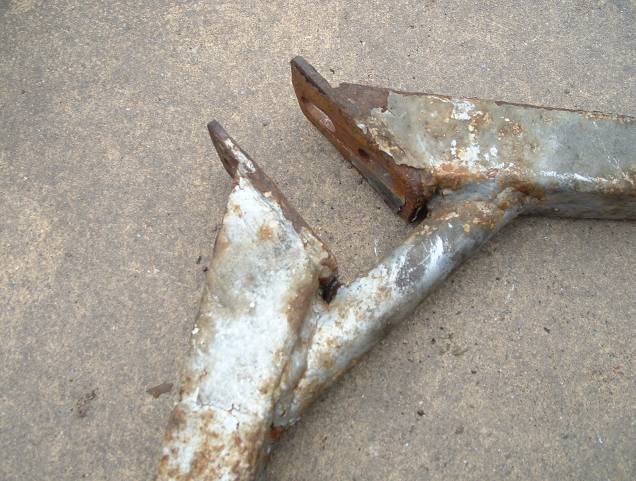
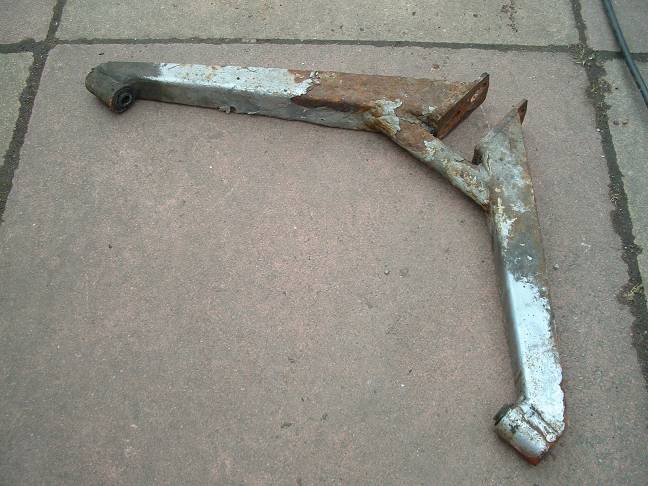
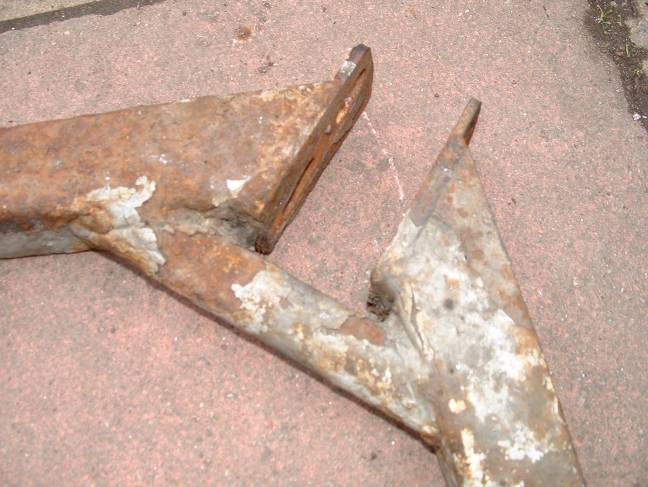
A
couple of the front wishbone bushes were in a really bad way, the
rubber was no longer attached to the metal outer casing. The
inner (with rubber) could freely be moved away from the outer!
With
the wishbones now removed it was time to separate the body from the
chassis. Because I was going to be doing this alone I followed a
method used by Phil (AKA Wheeljack888 on Pistonheads) on his Chim
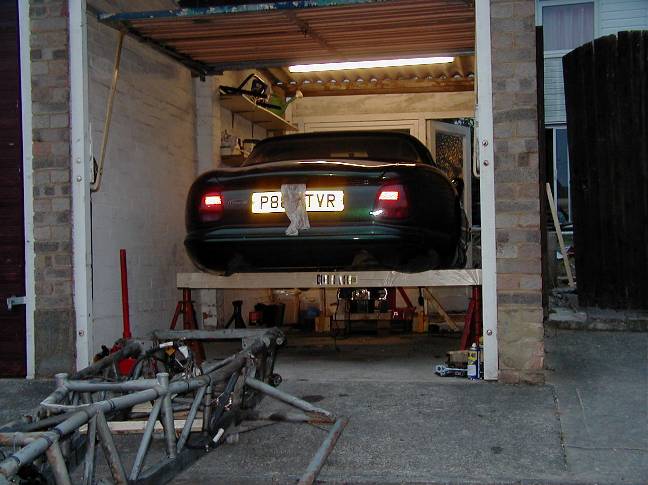
This method involves getting the body and chassis up high, the supporting the body and lowering the chassis down and out.
The
body is held on by 28 bolts in all; 2 near the radiator, 2 below the
dash, 4 behind the fuel tank, 14 underneath on the outriggers, and 6
for seatbelts. I also removed the radiator before the
engine. The brake lines were all disconnected from the right hand
side of the engine bay, speedo sensor wiring disconnected, fuel tank
removed (to access the chassis bolts behind it), fuel pump wiring
removed and probably a few other bits which I can’t remember right now!
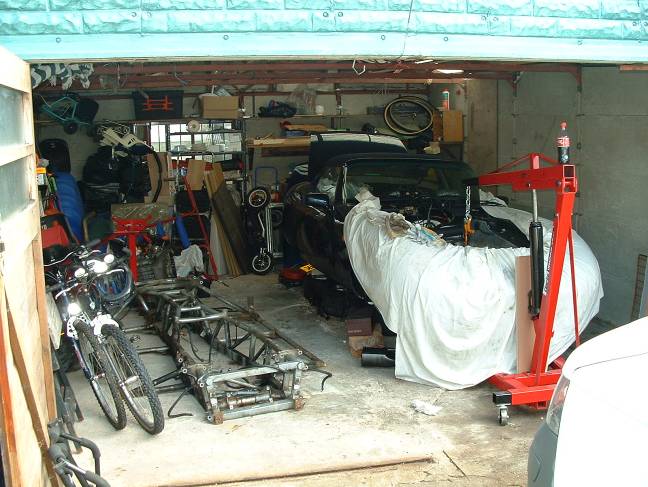
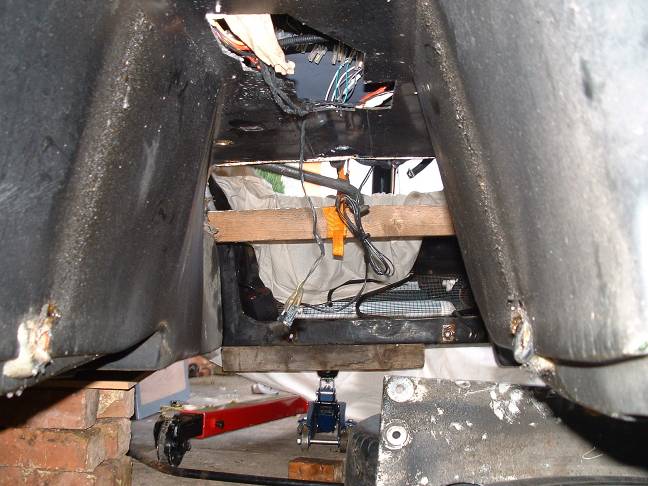
The
chassis was wedged quite tightly in to the body and would actually hold
there under its own weight! But with a little persuasion it came
out (I wish it was as easy as writing this to actually do all this
stuff!)
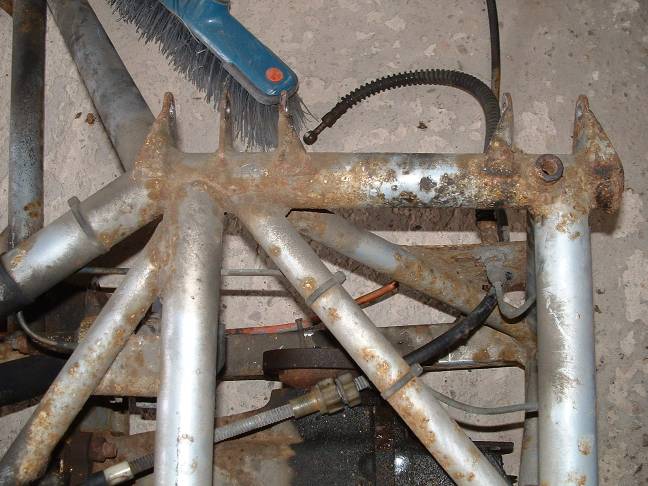
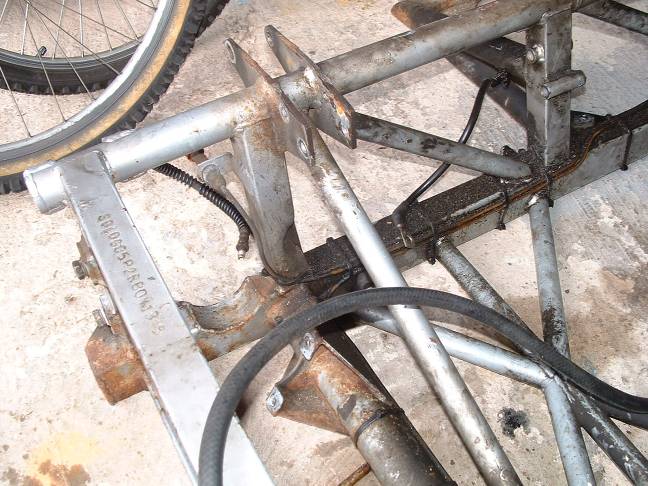
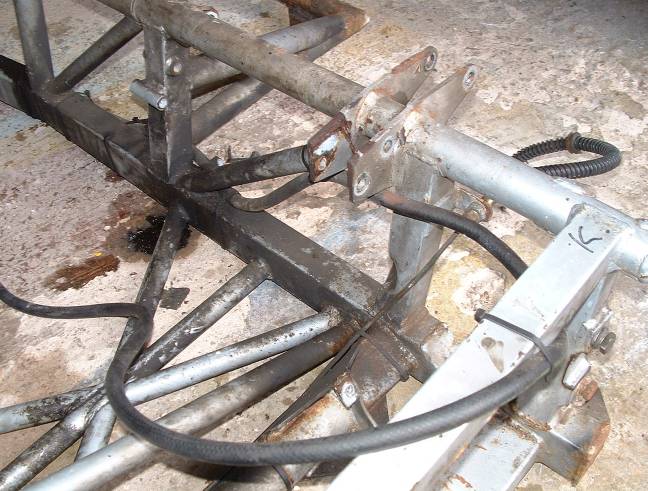
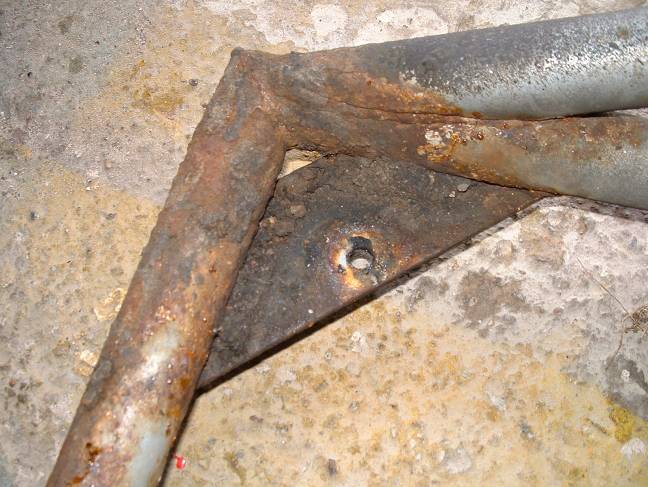
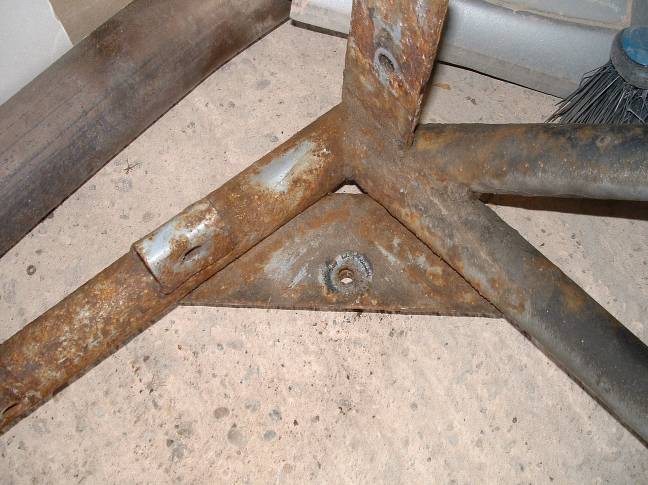
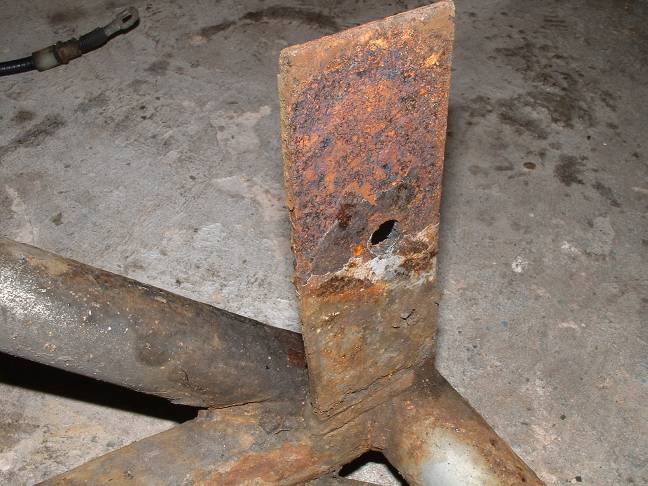
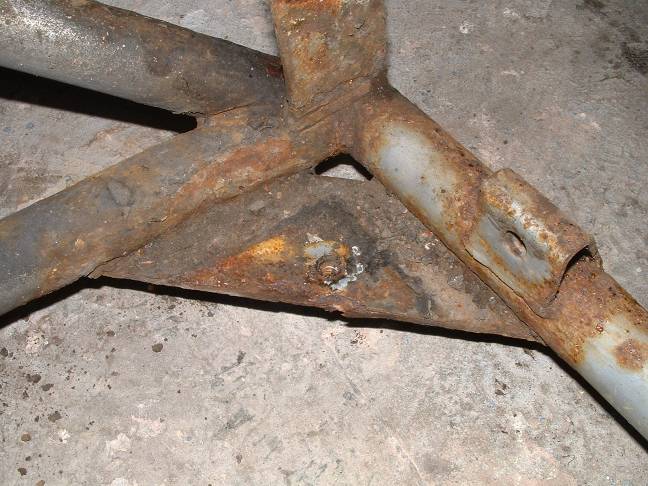
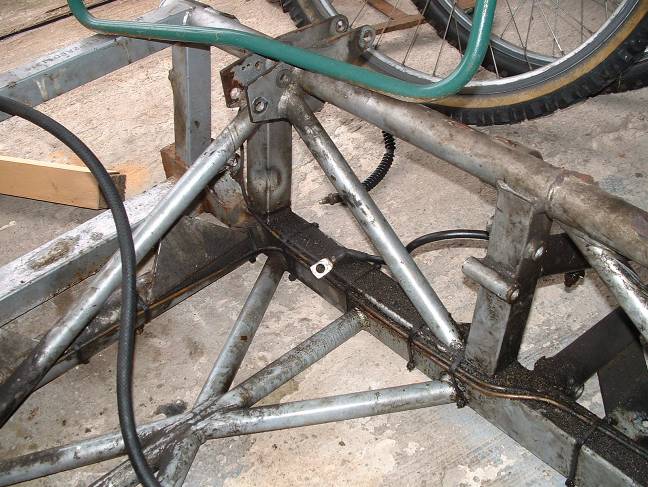
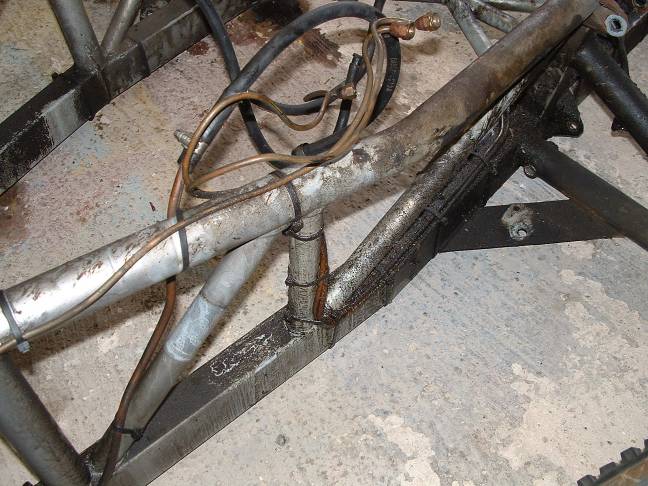
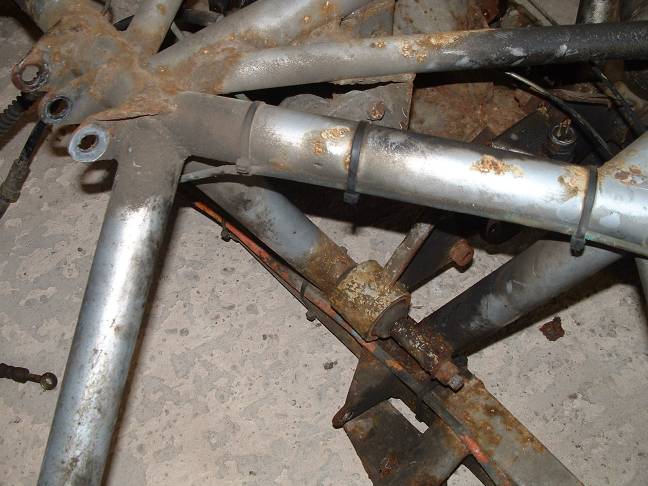
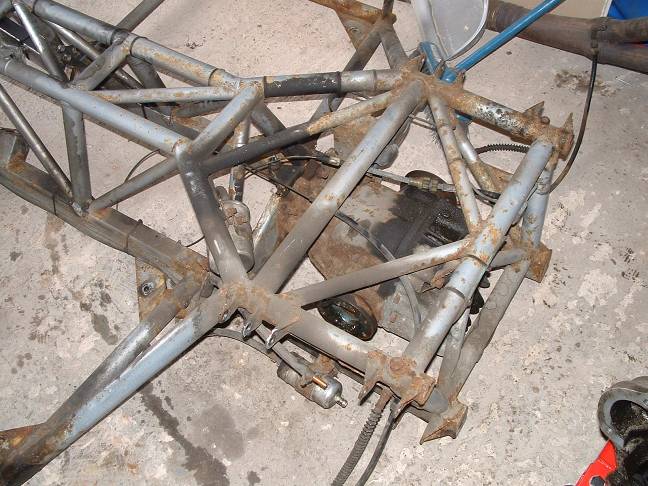
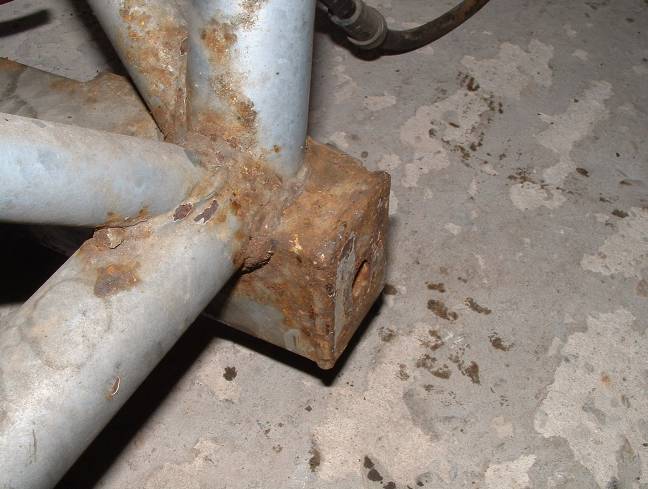
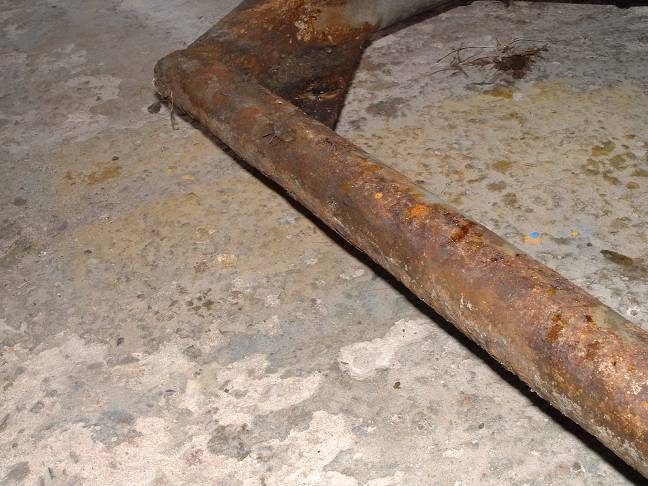
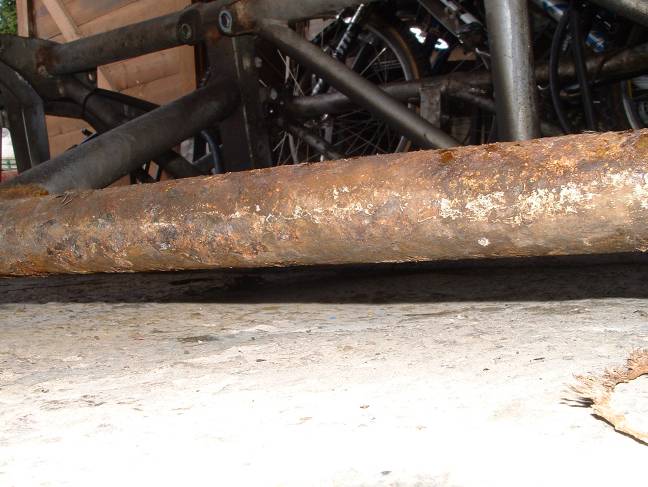
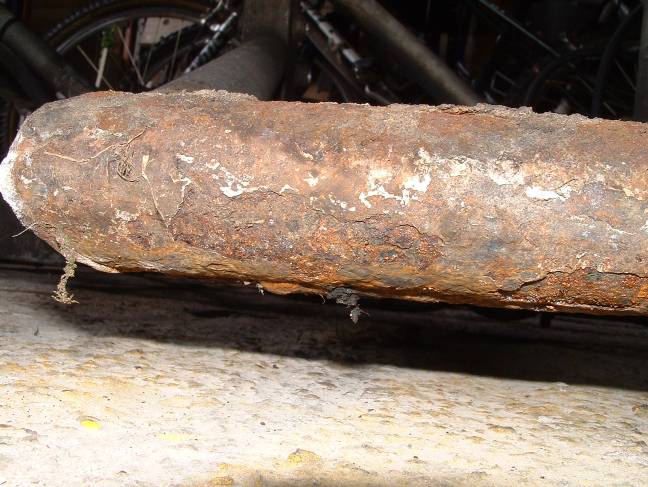
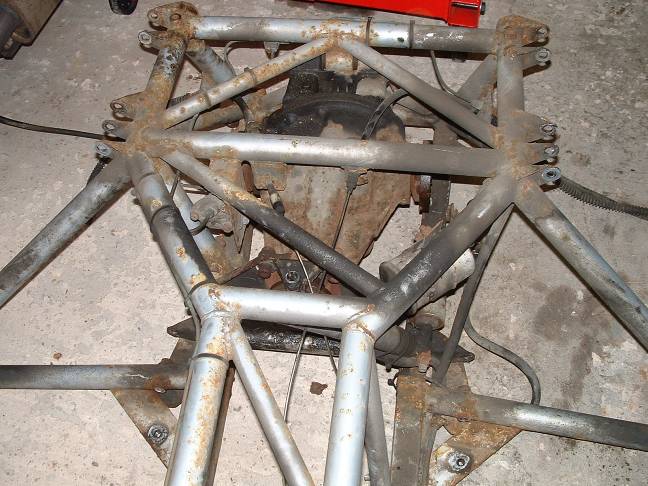
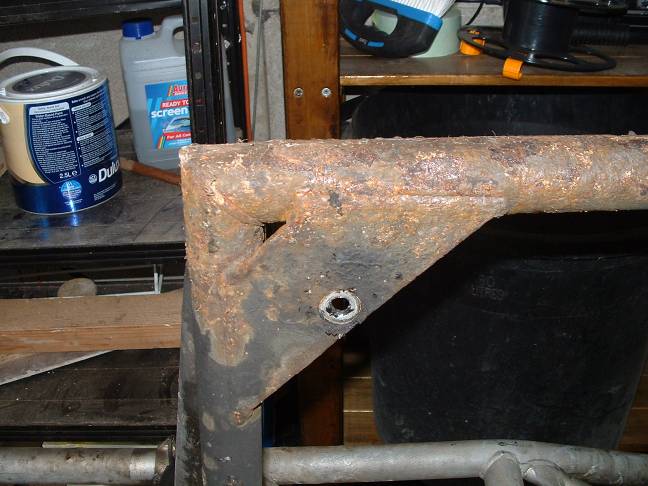
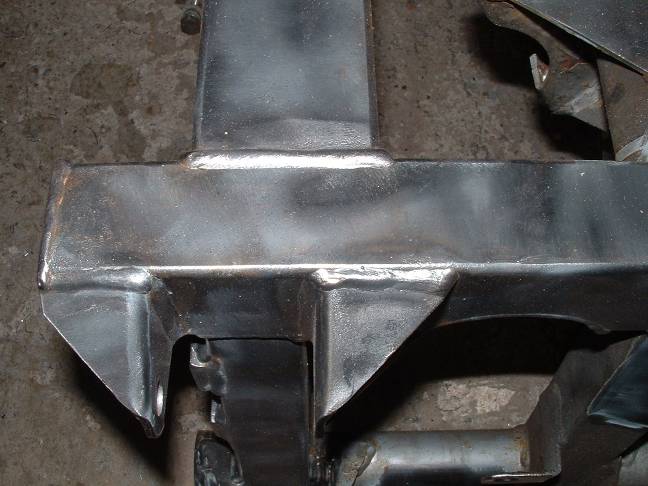
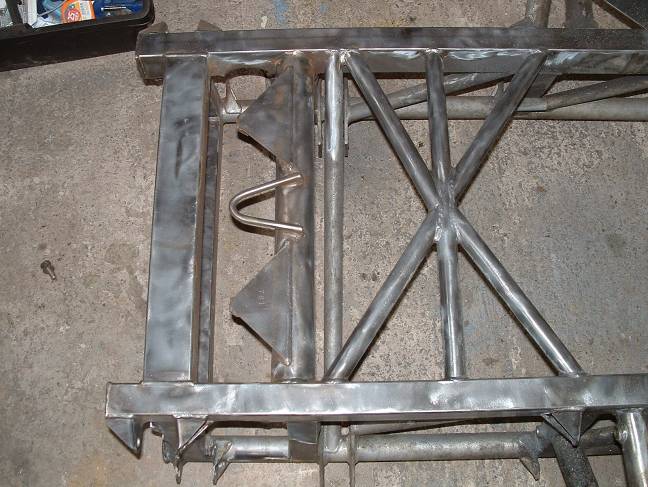
The chassis looked quite bad in some areas


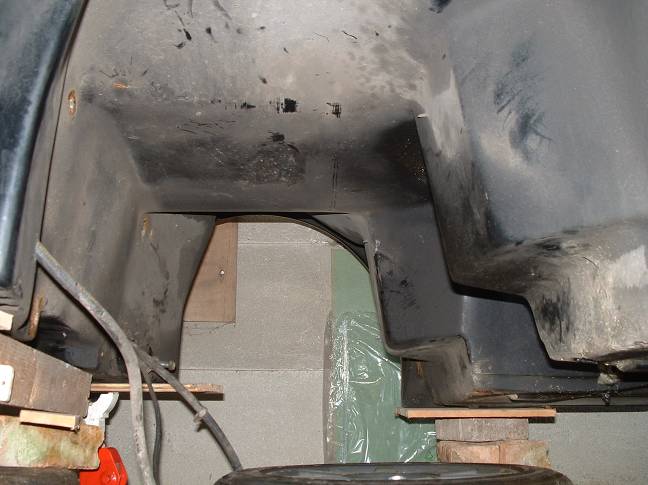
The underside of the body was in need of a clean as well
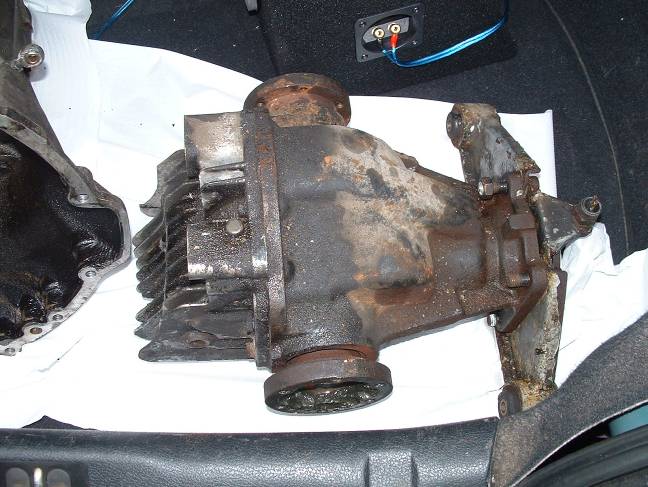
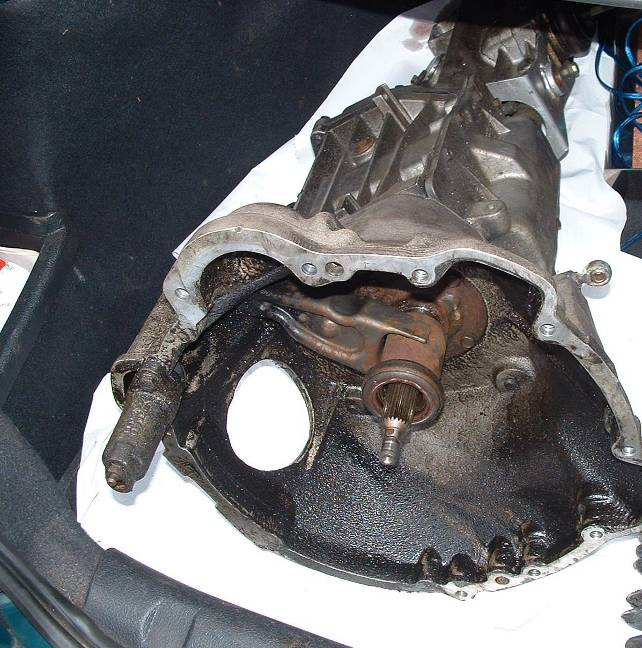
I
then removed the diff and realised now would be a good time to have it
and my gearbox reconditioned. After a bit of research I found
that ‘Competition Transmissions’ specialise in these units and were
more than happy to do the work for me
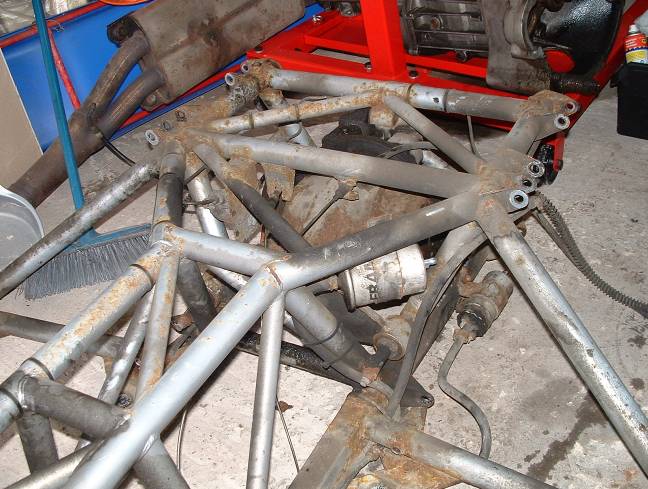
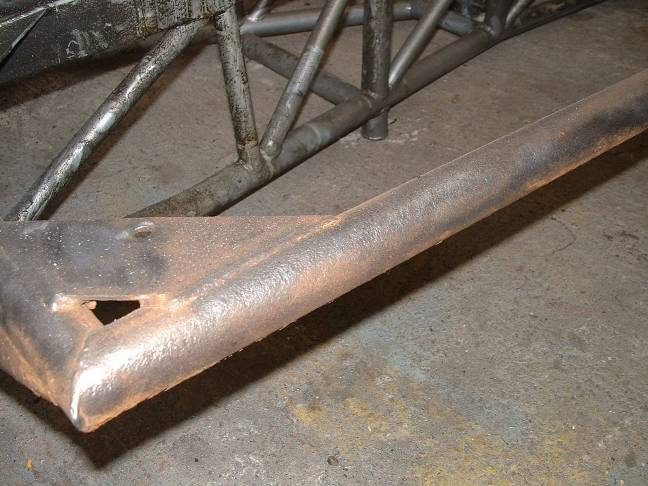
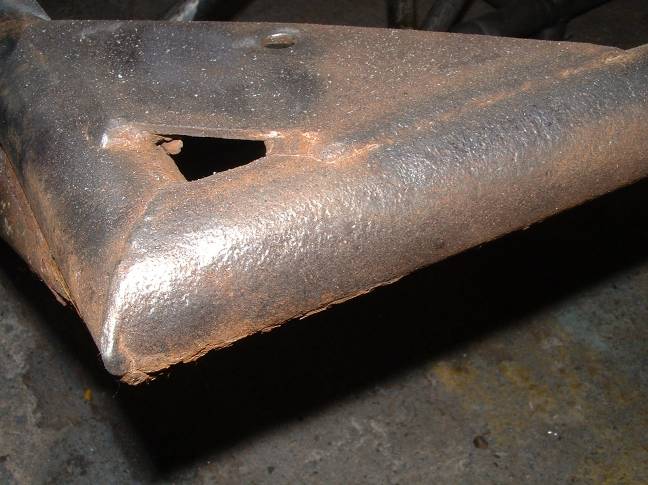
I
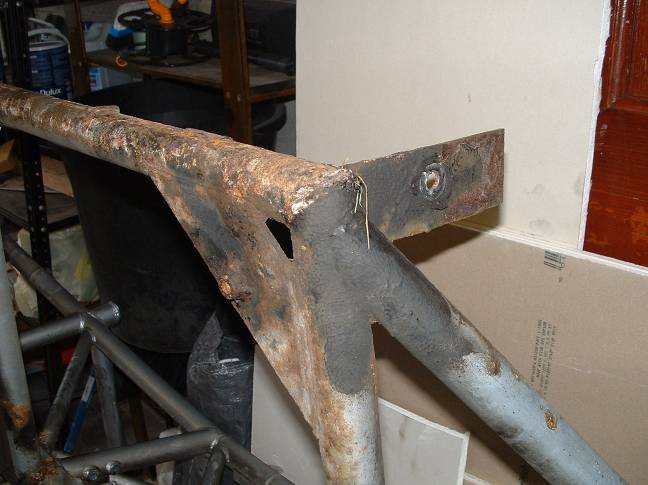
then stripped the chassis down to a bare frame and took the surface
rust of with my angle grinder using a knotted wire wheel and found that
it was indeed only surface rust and the integrity of the metal was
actually very good. It was good to find out that no welding was
necessary and that I’d caught the dreaded rust in the nick of time! J
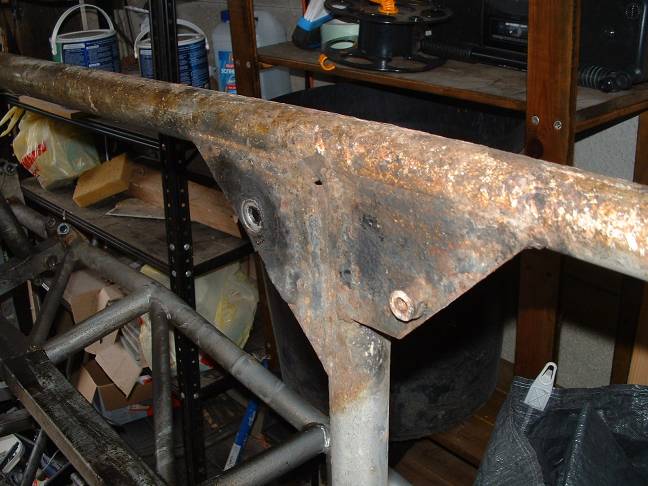
I
continued cleaning the chassis up with my trusty knotted wire wheel
(gone through 3 by now!) but came to the conclusion that I was getting
nowhere fast and also the surface was way to smooth for paint to key
to. So I sent the chassis away (and the wishbones and anti roll
bars) for shot blasting J
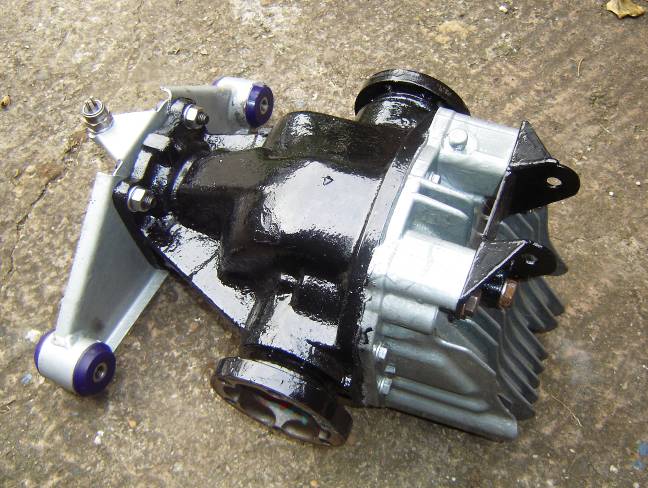
The
diff and box was now back from gearboxman, the result was a hefty bill
because the box needed a whole new gearset due to excessive wear. The
diff was a straight forward rebuild with new bearings. I fitted
new hi-tensile bolts to the diff mount bracket and also changed the old
bushes for nice new purple poly bushes. I gave both of them a
lick of paint with POR 15.
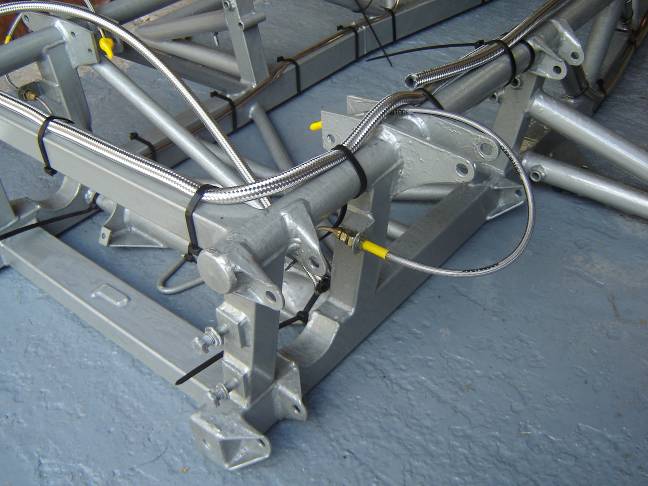
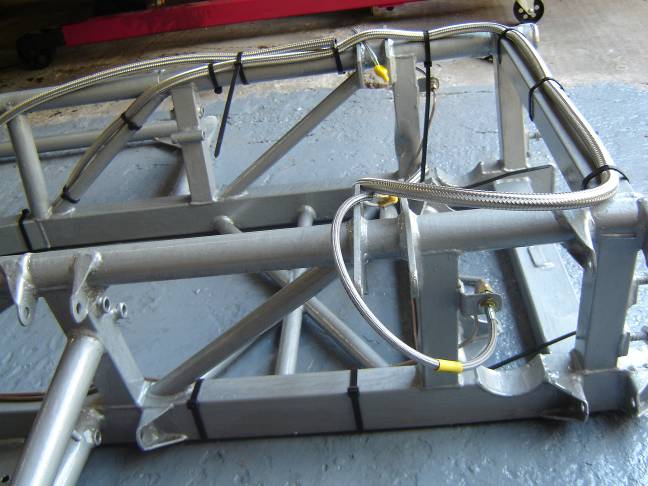
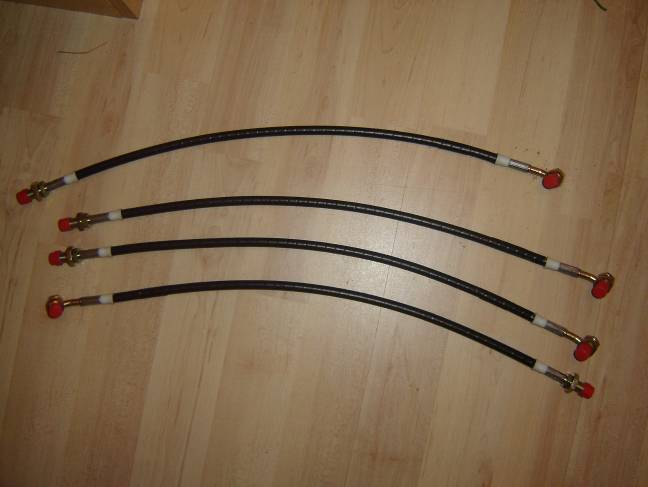
While the chassis was away I polished the brake and fuel lines up! Yes I am that sad!
Brake lines before
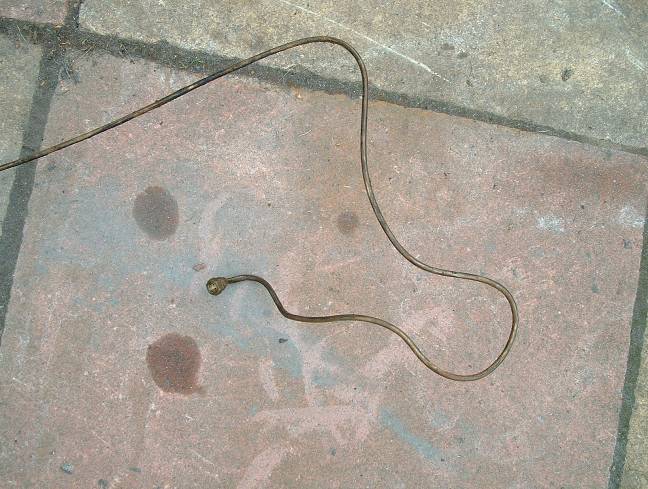
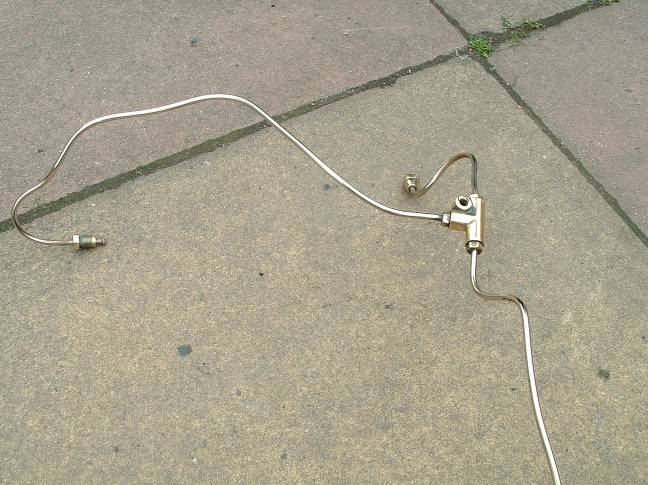
Brake
lines after many many hours of polishing, this is a crappy job and I
also did the copper fuel hoses! (All were flushed out before
being re-attached)
For
some reason I didn’t take any photos for a while now, I think I just
wanted to crack on once I’d got the chassis back. I spent a lot
of time removing all the bushes, the best way I found was to heat the
inner part of the bush up with a blow touch and then push this part
out. Then I’d carefully cut two slots in the outer to relive the
tension and then hammer it out. There are a lot of bushes and the
process is very long.
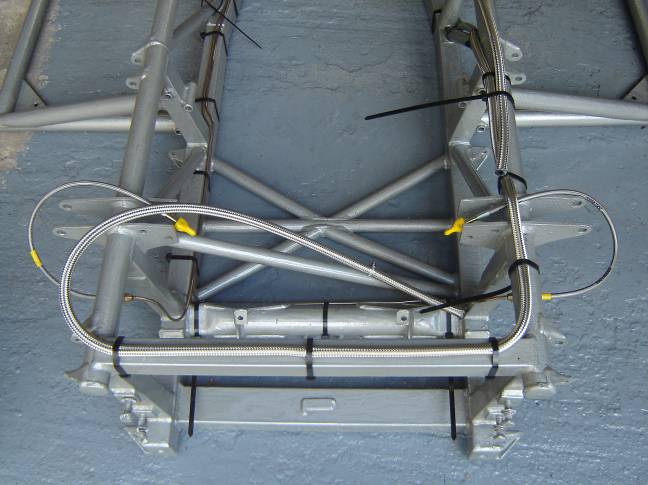
I bought a few metres of
high pressure stainless braided fuel hoses and have used this to
replace all of the rubber stuff (even the low pressure), it should last
far longer. I also bought a set of Goodridge stainless braided
brake lines.
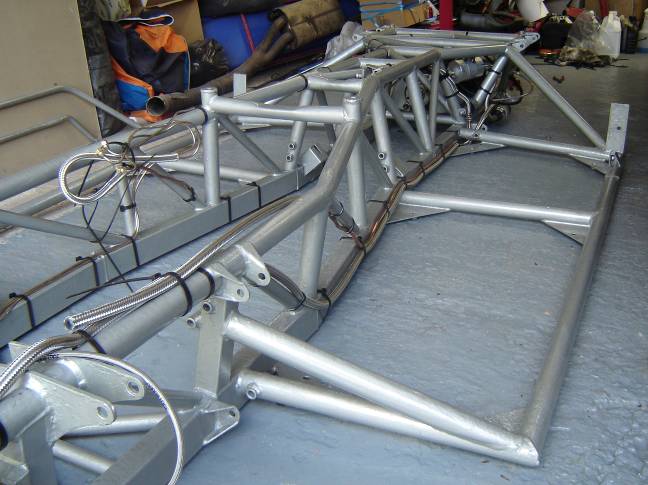
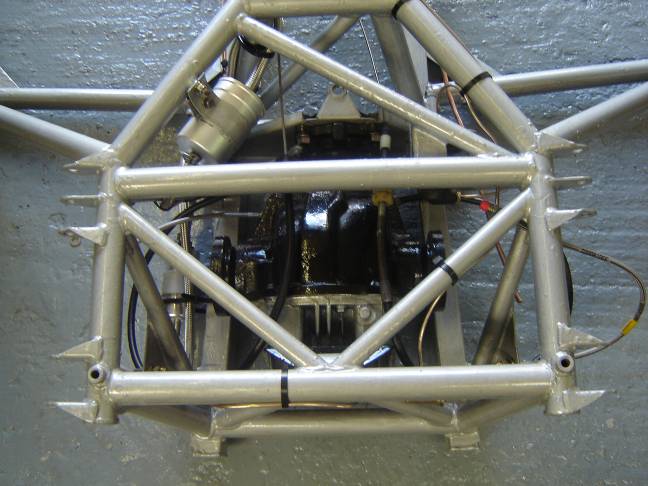
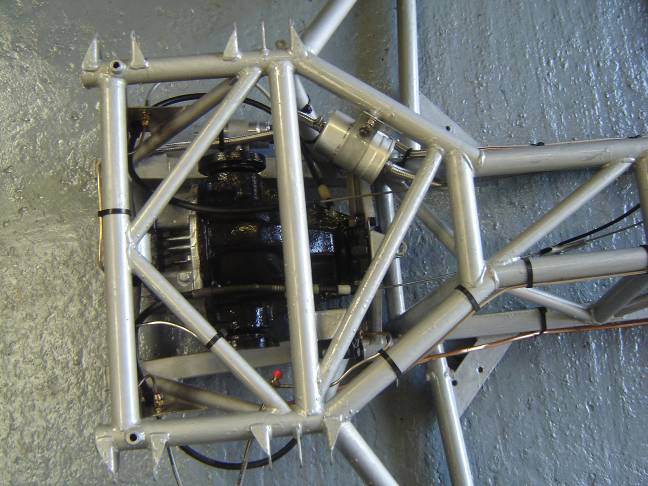
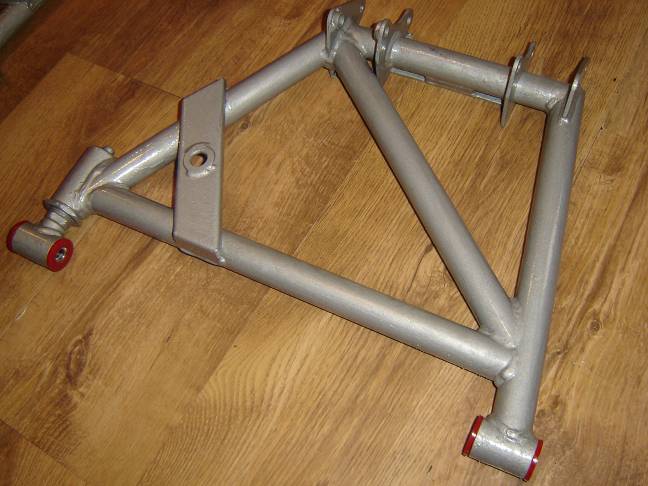
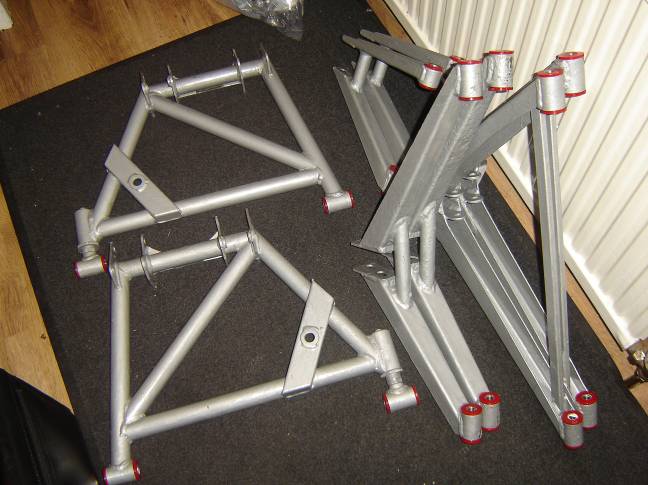
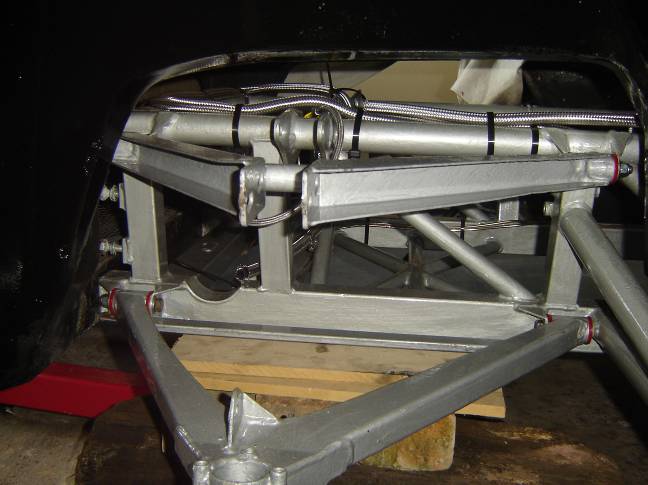
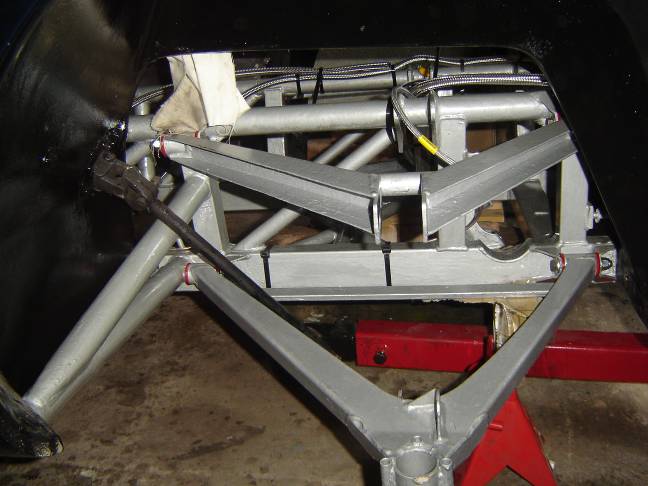
I them prepped the chassis and
wishbones the POR 15 Metal ready whish is a etching acid, this totally
cleans the metal of grease and eats into the surface providing a great
surface for the paint to adhere to. After several coats (must
have been nearly ten on the out riggers!) of silver POR 15 here’s what
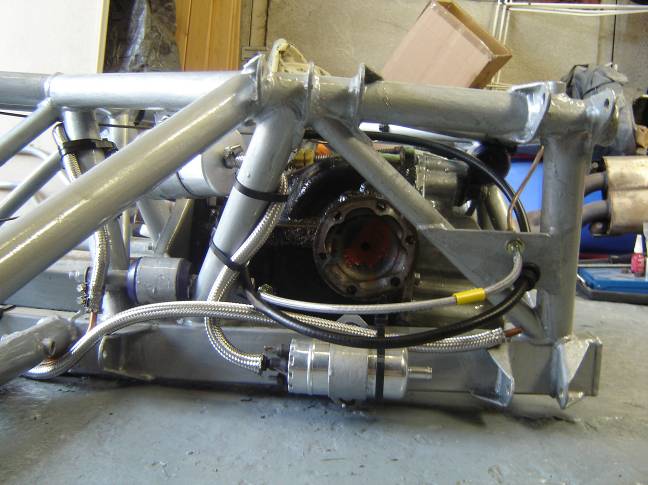
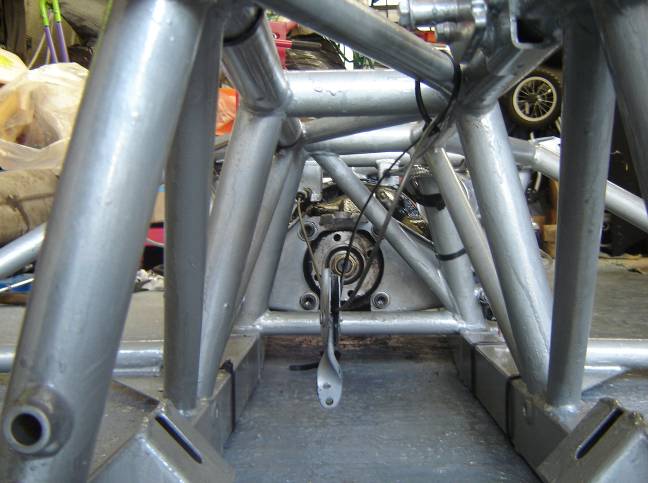
the chassis looked like once the diff was fitted. A vast
improvement I’m sure you’ll agree!
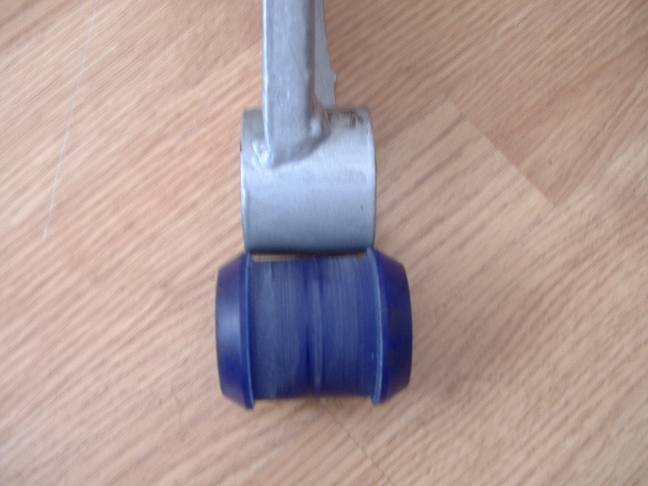
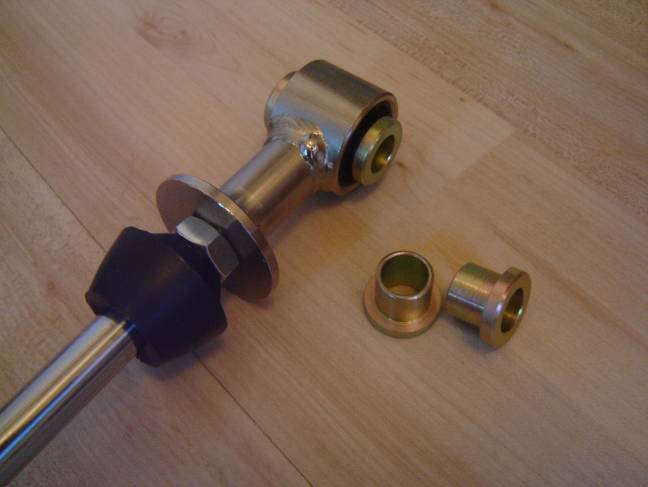
Fitting
the diff bushes was great fun! (nearly as much as removing the old
ones) I discovered that they needed trimming down a little.
Here’s the bush before trimming
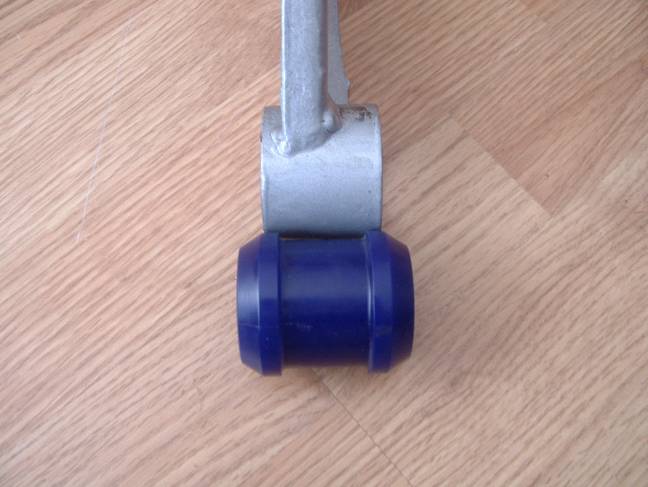
And here it is again after I’d turned some material off (put it in my drill and used a chisel on it!)
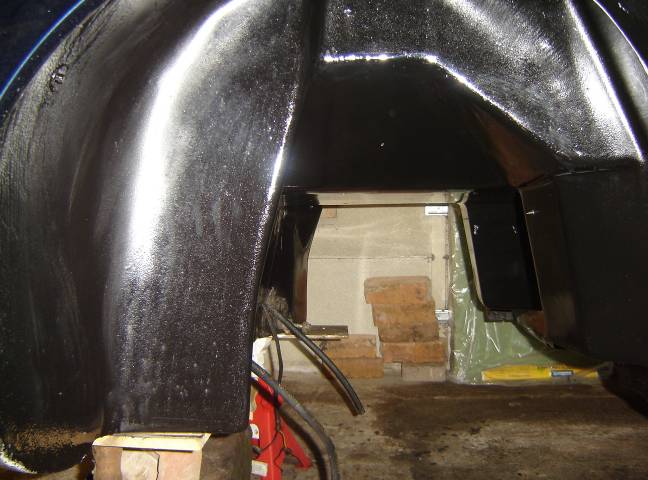
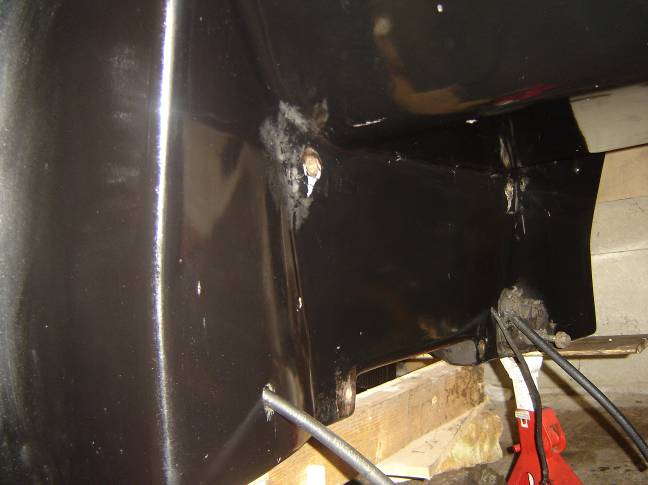
The
underside of the body and the wheel arches were not looking great and
needed a good clean. Scrubbing the under side of the body was a
horrible job and took several hours (over a few days) with white
spirits, rags and brushes. But once it was done I topped it with
a coat of wax to protect it and make it easier to clean in the
future. I painted the wheel arches in a special stone chip
resistant paint and topped it with black POR 15.

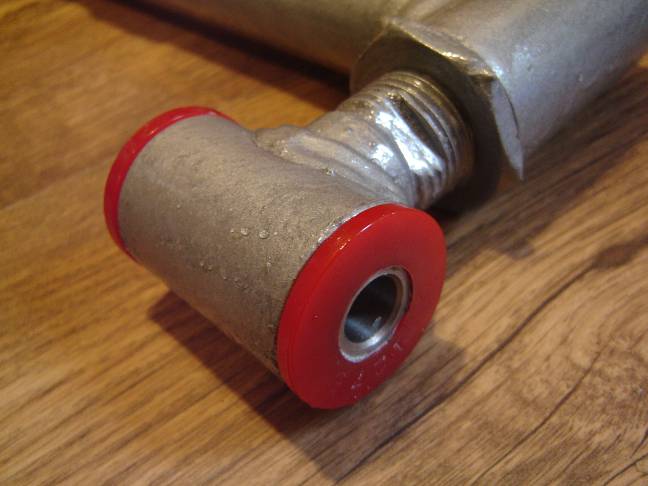
It
was time now to fit the new wishbone bushes, I decided to go for the
harder compound Red poly bushes from Superflex, this should help make
the chassis a little sharper (certainly can’t be worse than the ones I
removed anyway!).

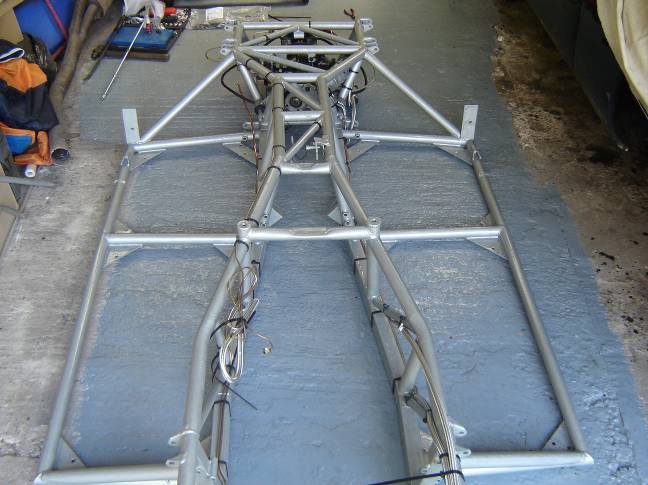
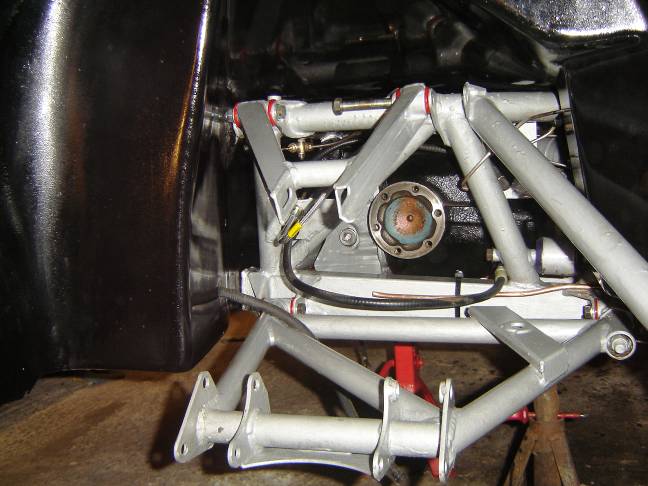
After
fitting the wishbones (using new nuts) it was time to mate the chassis
back with the body. I layed cardboard on the floor under the body
and dragged the chassis under and in to place. With the aid of a
few jacks and friend we got the chassis back in to the body. This
was a milestone for me J To see your pride and joy in so many
pieces can be quite worrying, now the major items were back together I
was much happier J
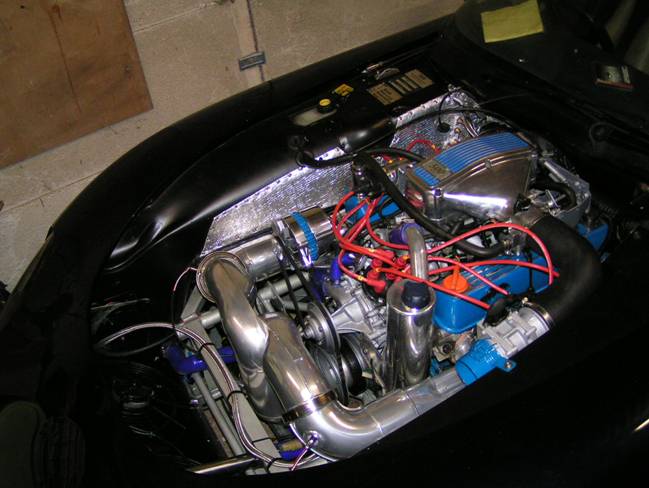
While
the chassis was away being blasted I removed the heat shields from the
engine bay, they were well past their best by now anyway.

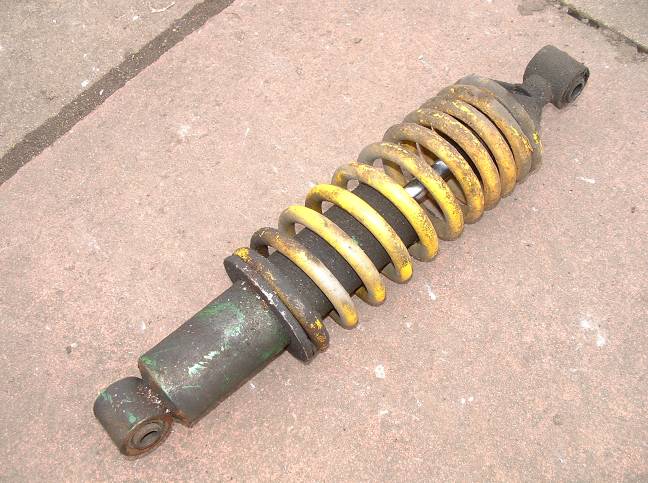
Now
that all the bushes had been changed I decided it would be a half job
to put the original dampers back on, they were the original items and
at 10 years old were probably not performing as well as the day they
left the factory.
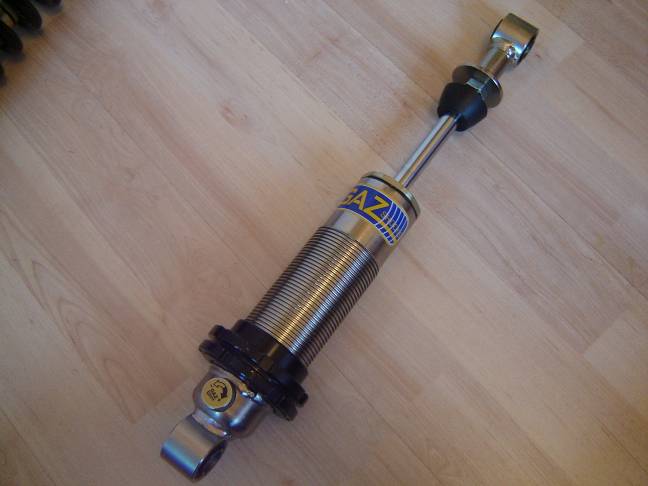
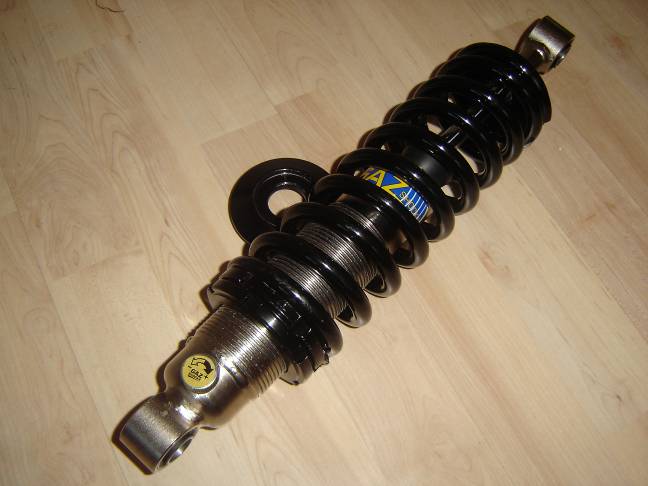
Choosing
a damper to suit my needs took a while. I asked around after
other peoples experiences with certain dampers and suppliers and
eventually came to conclusion to use the latest generation of GAZ
dampers. I went for the nickel coated option on the damper, 275lb
rear springs and 325lb front springs. I may have to change the
springs at a later date to suit the type of driving I do but I thought
this to be a good starting point. I purchased the springs and
dampers from Derek at absolutely Shocks. Recent reports from
people suggest the dampers are very good; I can’t wait to find out J
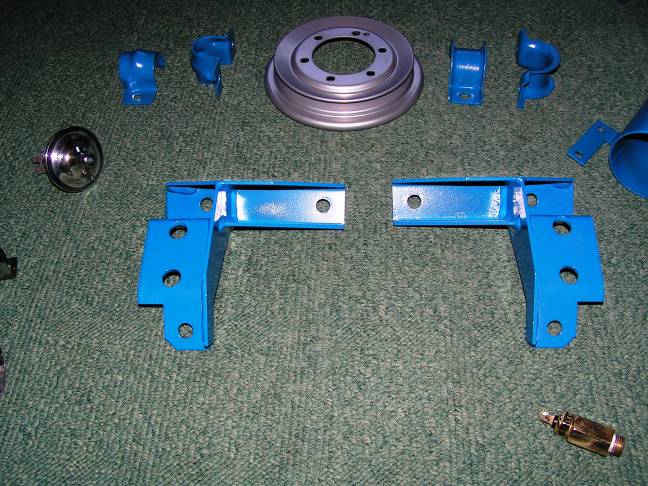
My
next step was to re new all the brake disc/pads and buy new
tyres. But I’d always fancied a set of spider wheels in
Anthracite, so I set about researching how to approach the task of
converting my 4 stud hubs to 5 stud and at the same time bought a set
of silver 16inch spiders with the intention of having them powder
coated Anthracite
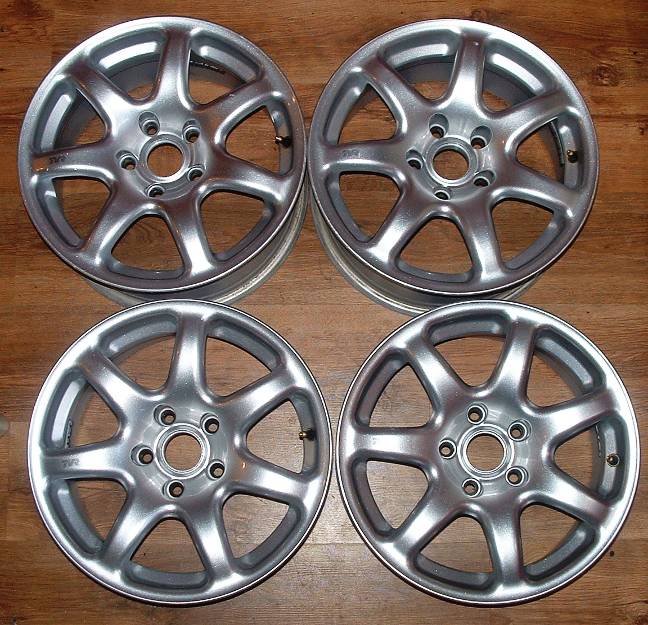
The
Spiders were second hand but in great condition. But after
weighing up the cost and hassle of having the wheels coated, hubs
converted and buying new disc/pads and tyres all around I decided it
was not for me. So I splashed out on a Spider conversion from the
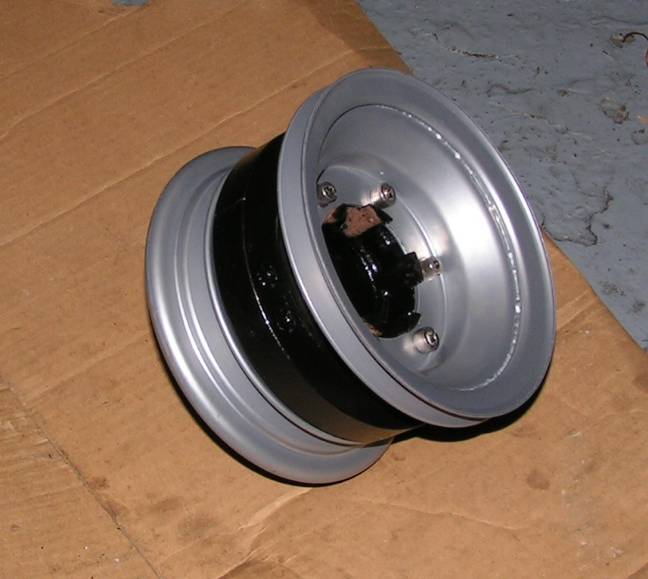
factory J They came with everything I needed:
Anthracite wheels
5 Stud hubs
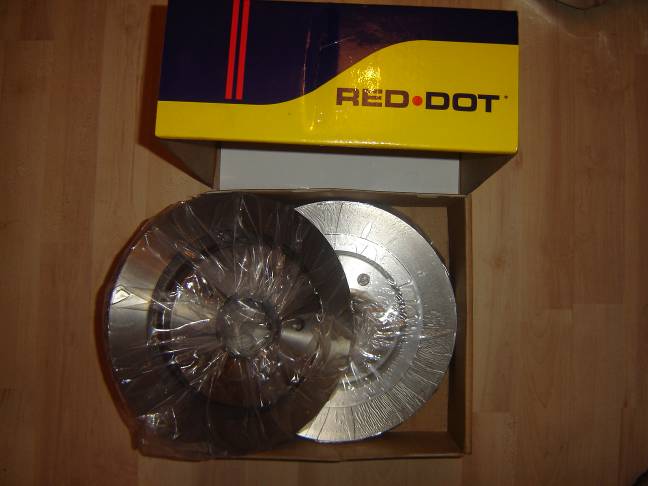
Rear discs
New brake line (which I have still not used because I already fitted new Goodridge items)
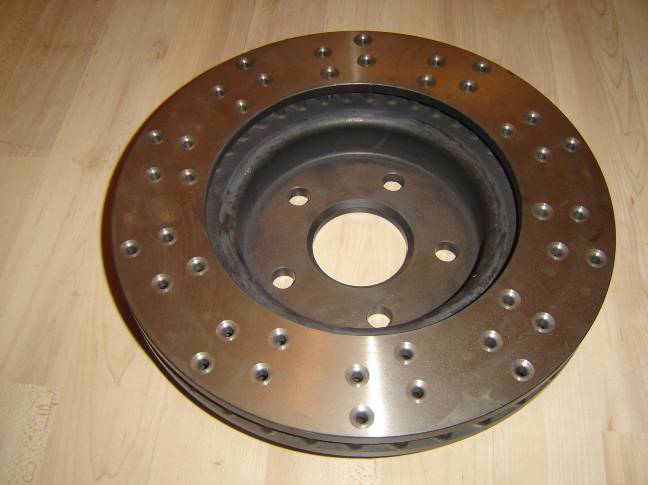
Big discs (I have now painted the unswept area and inner centre part to prevent corrosion, but I don’t have a pic of it)
4 Pot AP Racing callipers
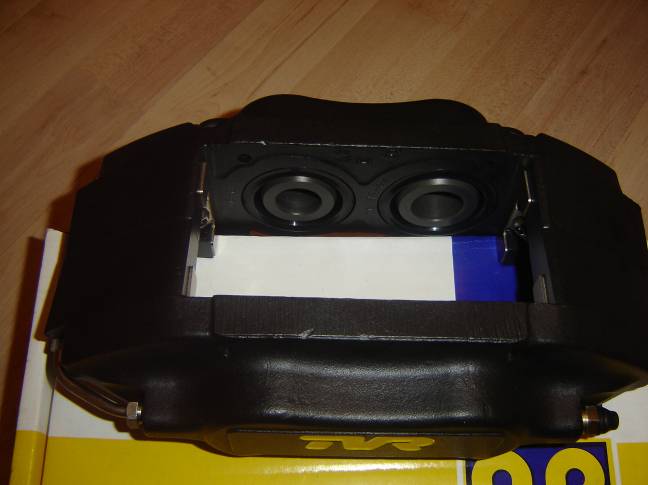
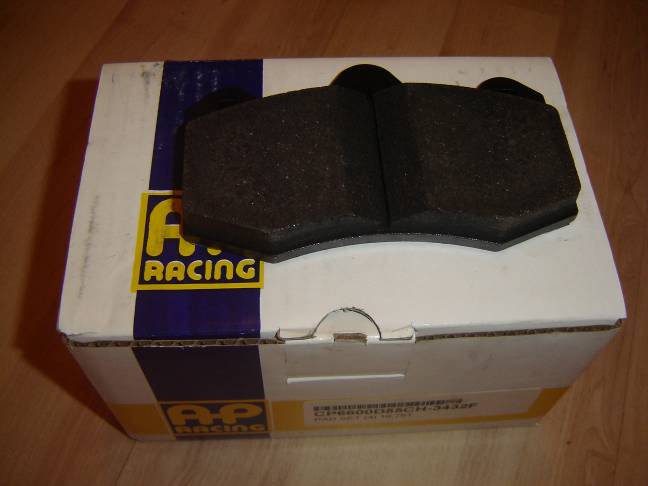
AP pads all around
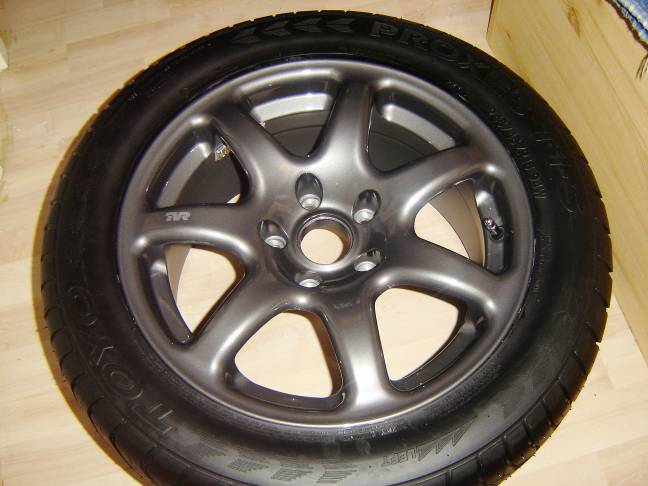
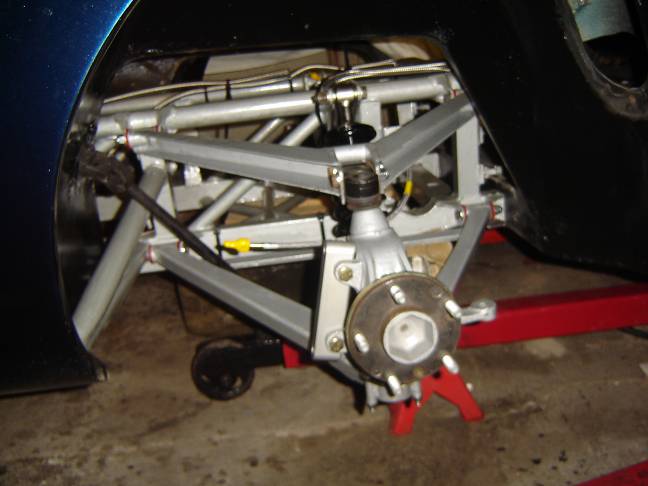
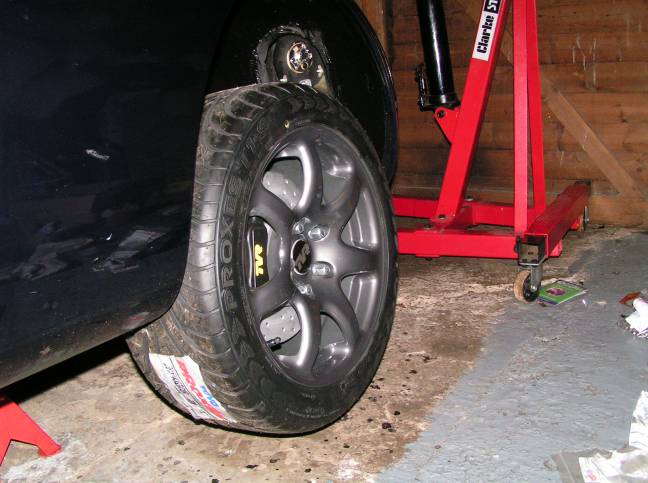
Here a pic showing the new 5 stud hub fitted with calliper adaptor bracket awaiting fitment of the calliper
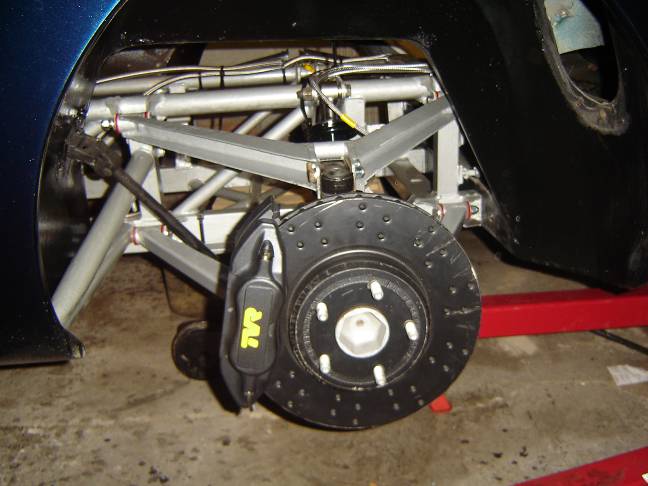
And here with the disc and calliper fitted
And here it was with the wheel on
New
bottom ball joints, track rod ends and top ball joint have been put on
the front. The steering should feel better than new after all
this work J
I then proceeded to clean all of the parts that were going to be going back on the car:
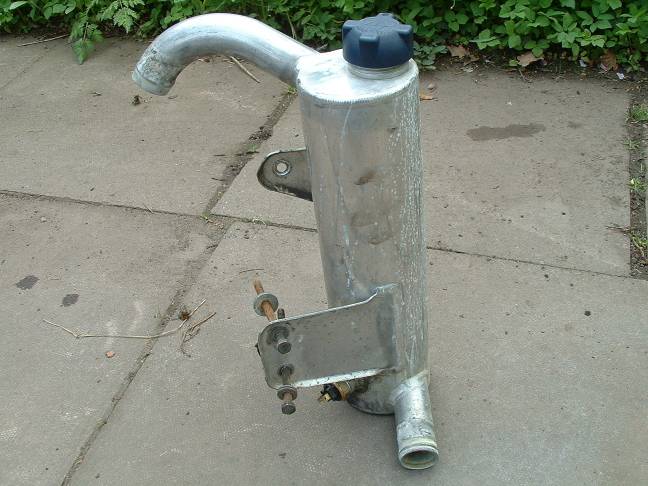
Header tank before
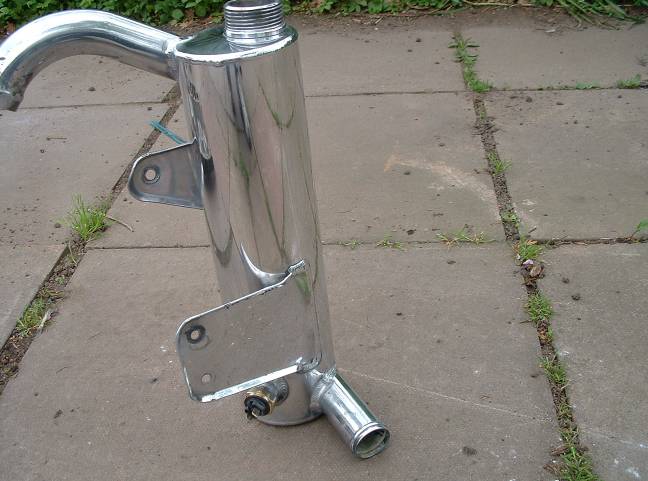
Header tank after a few hours polishing
Steering rack before

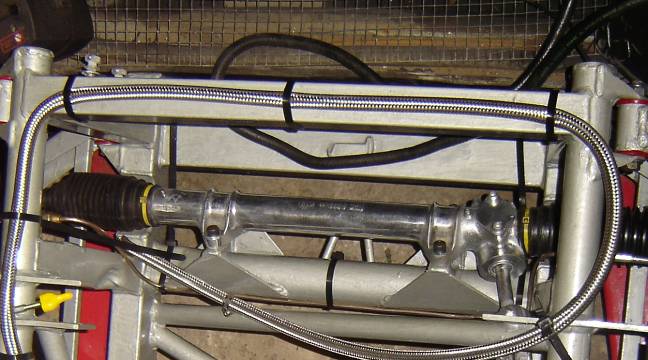
Steering
rack after cleaning and polish and refitting to chassis (not the best
pic, it had got a bit dirty by now and needs a wipe down)
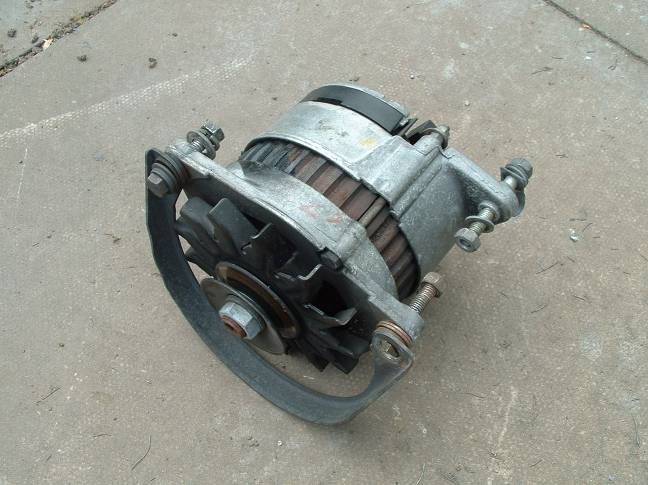
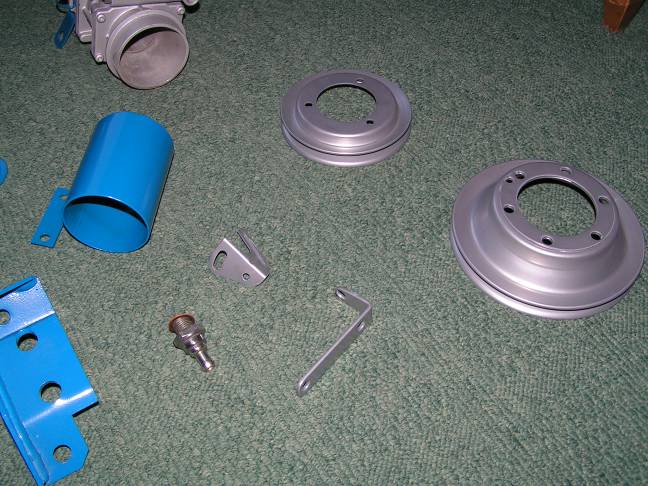
Alternator before
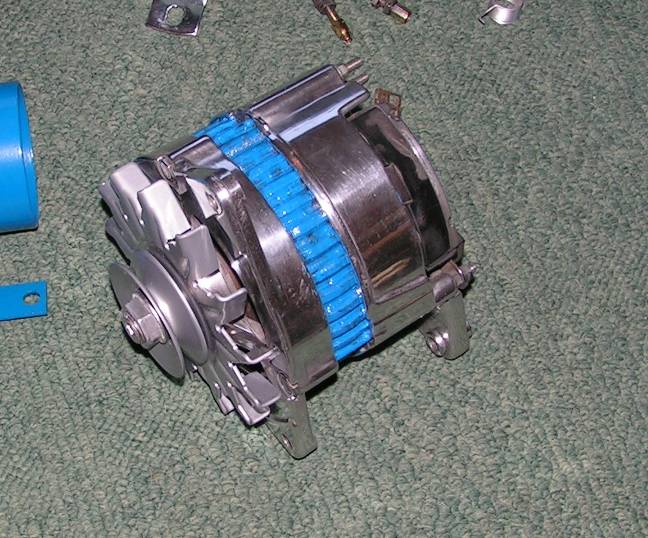
Alternator after (fan and pulley powder coated, body polished, blue paint was awaiting a second coat in this picture)
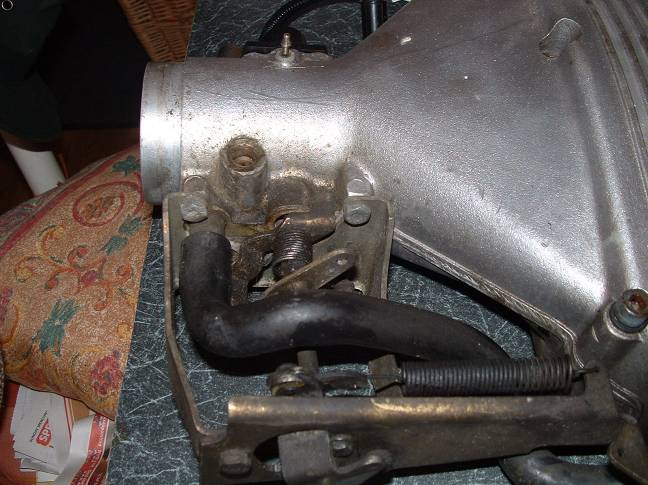
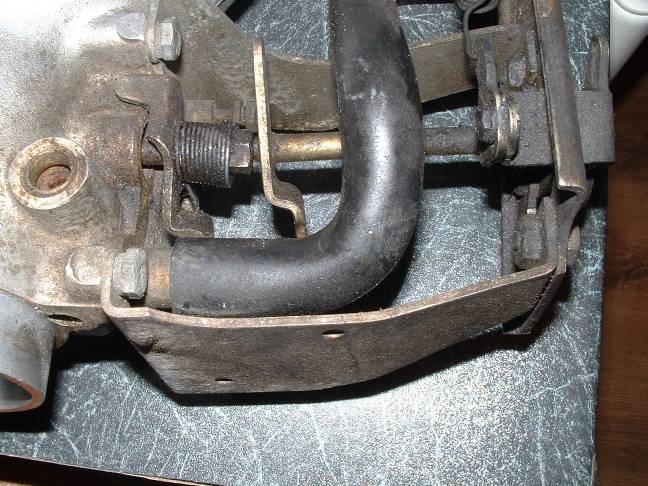
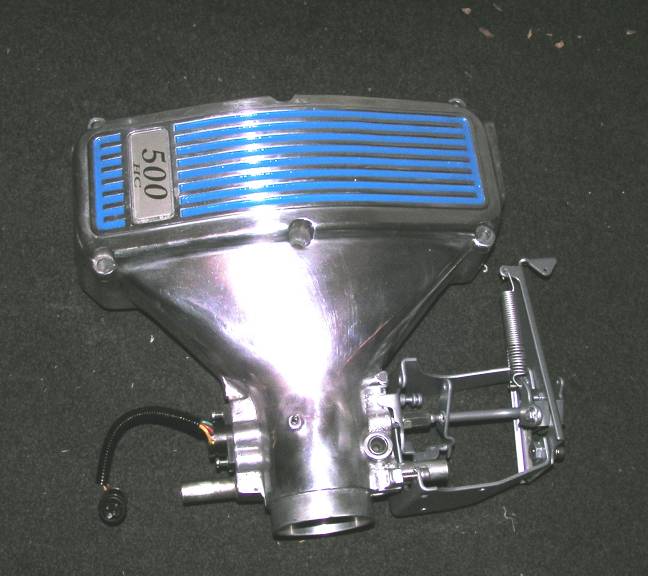
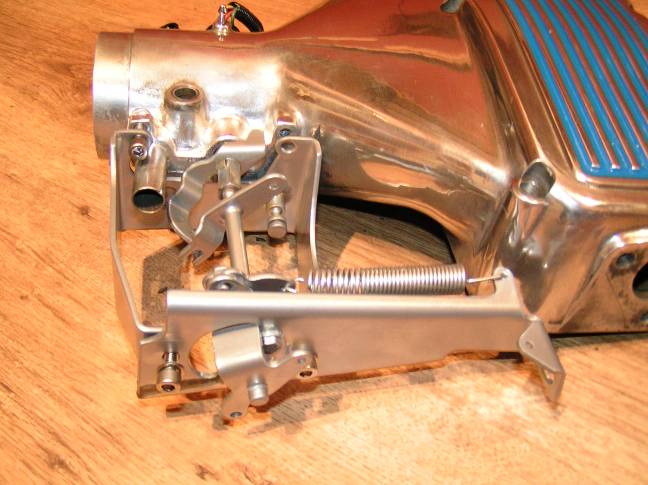
Plenum and throttle linkage before

Plenum and throttle linkage after
Linkage powder coated
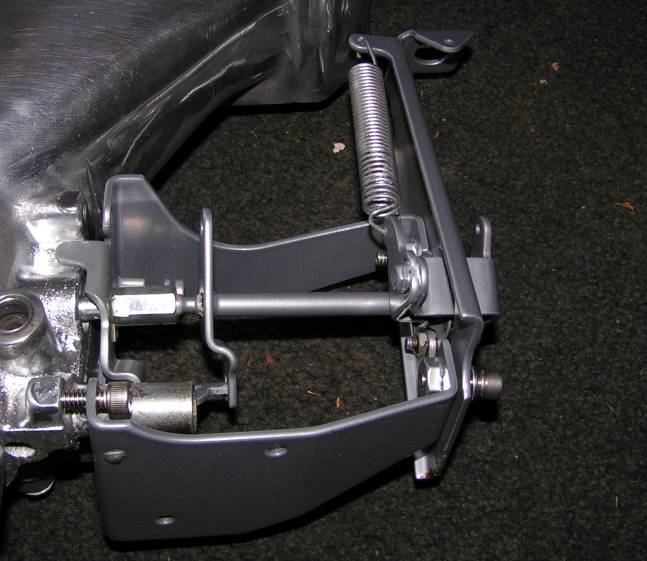
Plenum after a lot of polishing
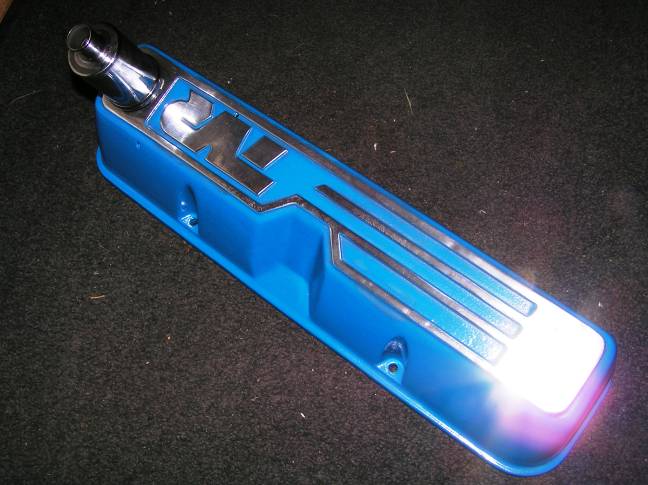
Rocker cover before
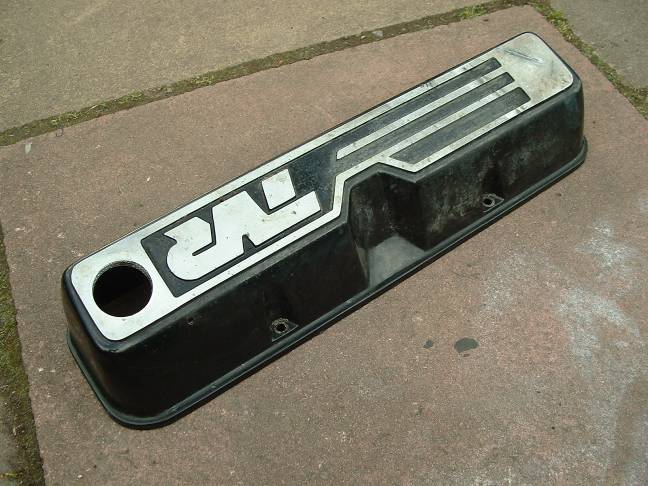
Rocker cover after polishing
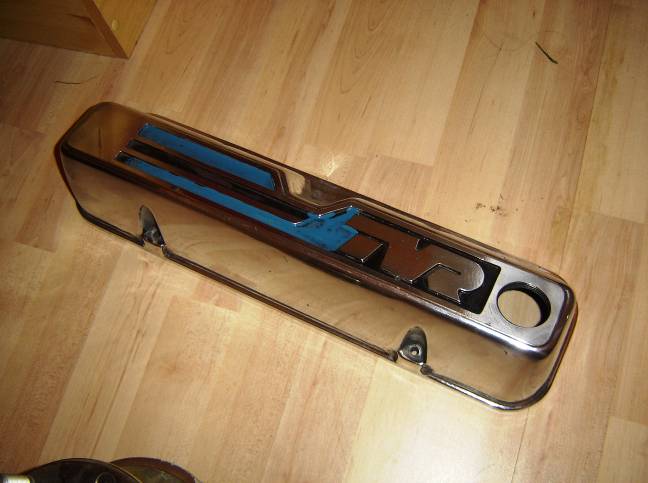
After
polishing the rocker covers I wasn’t happy with the finish so I sent
them away to be powder coated, I am much happier with this finish
I then prepped a few parts ready for chroming but decided to have them powder coated as well
(Before)
(After)
And a few more bits polished
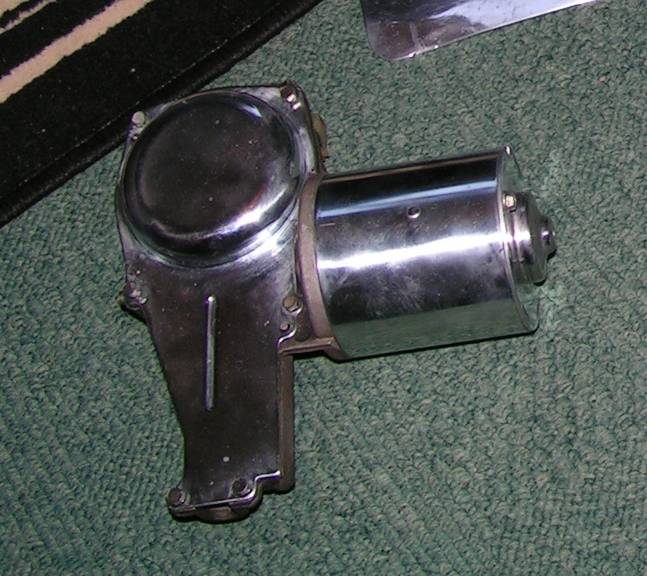
Wiper motor casing machine polished
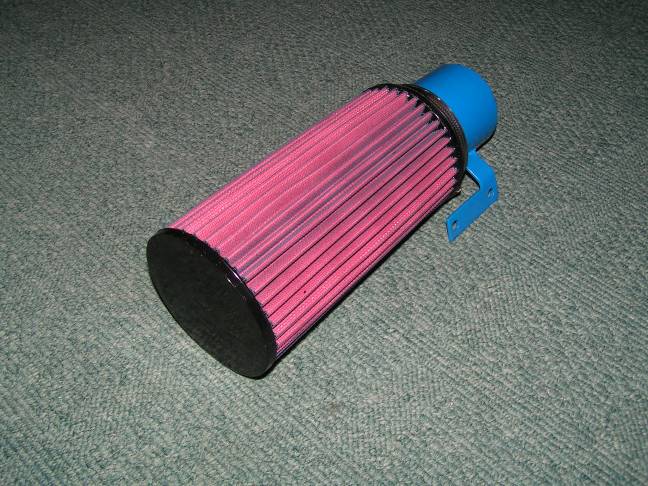
I also bought a few bits from ACT J
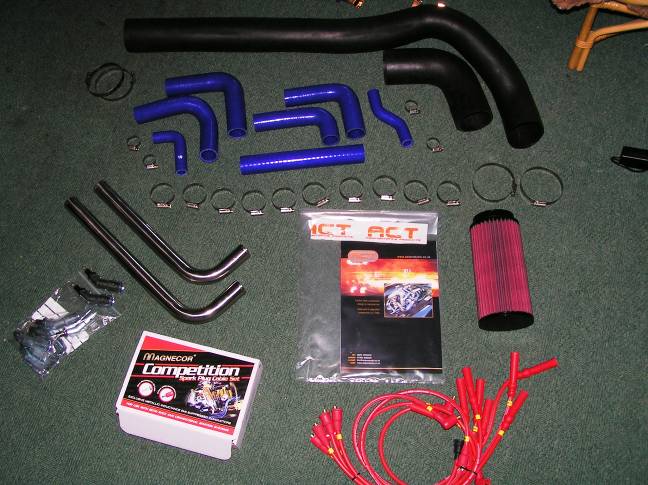
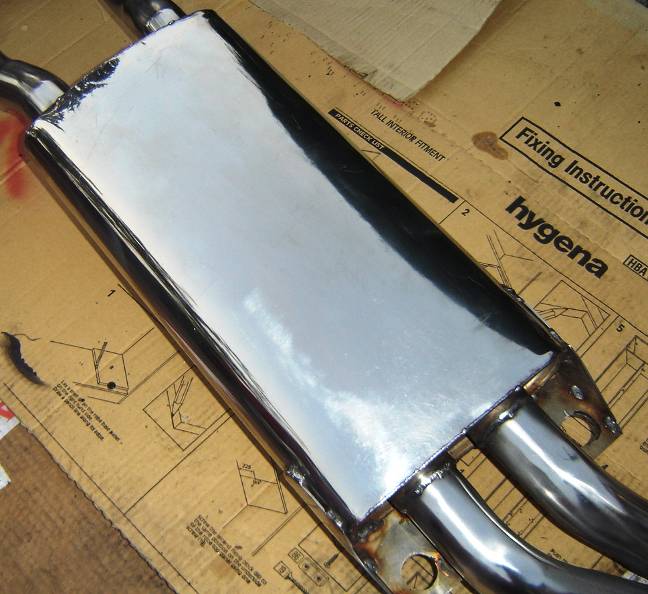
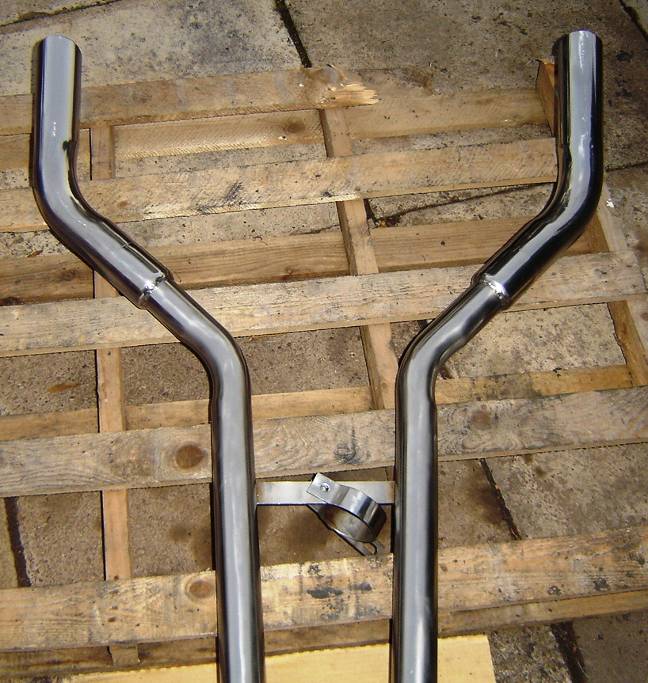
As
well as the bits above I also purchased a stainless exhaust system from
Tim at ACT, I specced it to look totally standard but be completely
straight through. Basically the same as having the silencer
sleeved but instead of being sleeved it was made that way by JP. I
needed a new exhaust (well would have soon looking at the state of the
old system) anyway so this is why I went this route. My old
silencer was already sleeved.
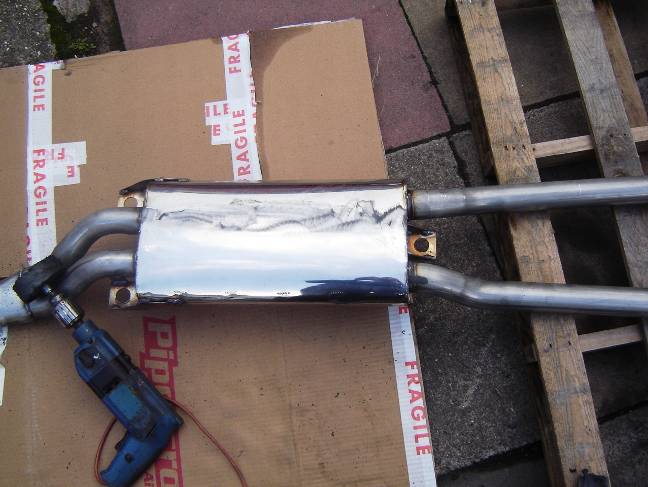
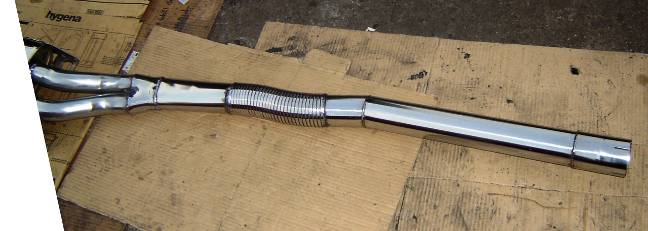
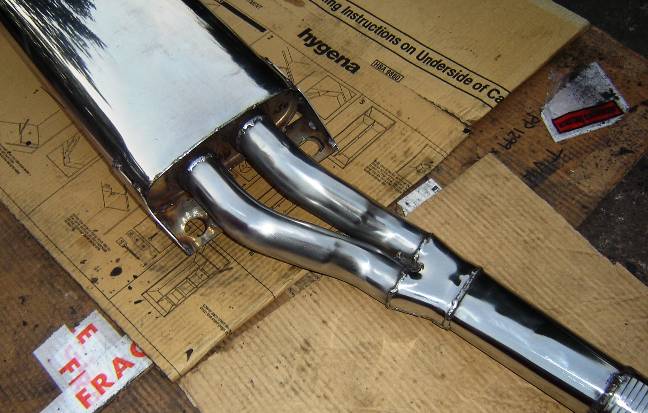
Me being me I wasn’t happy with how shiny the exhaust was so I set at polishing it up further
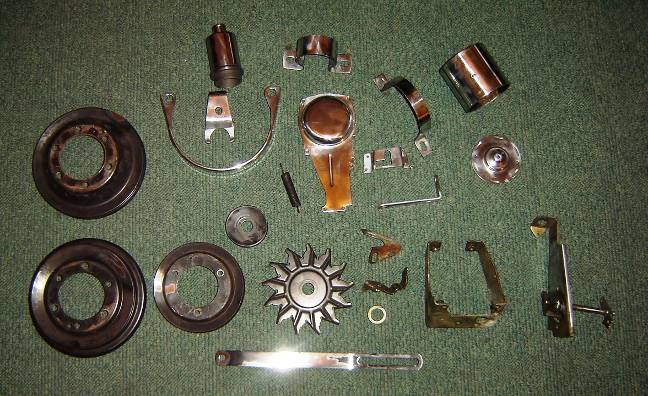
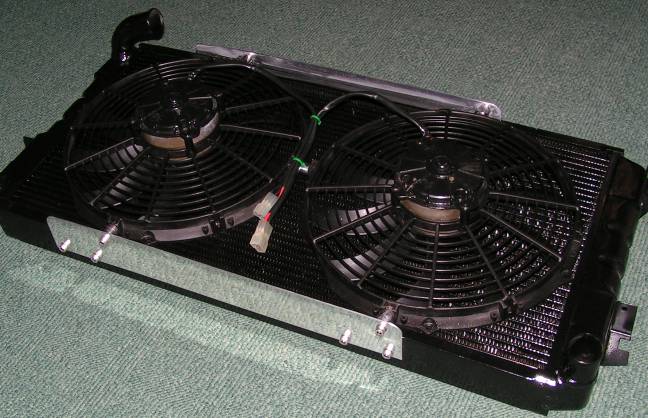
The
radiator and fans were looking a bit tired so I cleaned up and
resprayed the rad and spent a lot of time cleaning the fans up
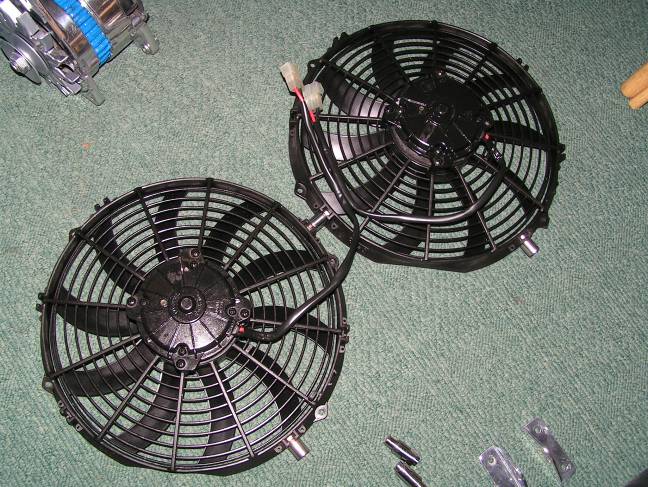
To
finish them off I polished up the aluminium fan holders and spacers and
used stainless stain cap head bolts to attach them (this is an area
that is hardly seen in the car but I still had to do it!)
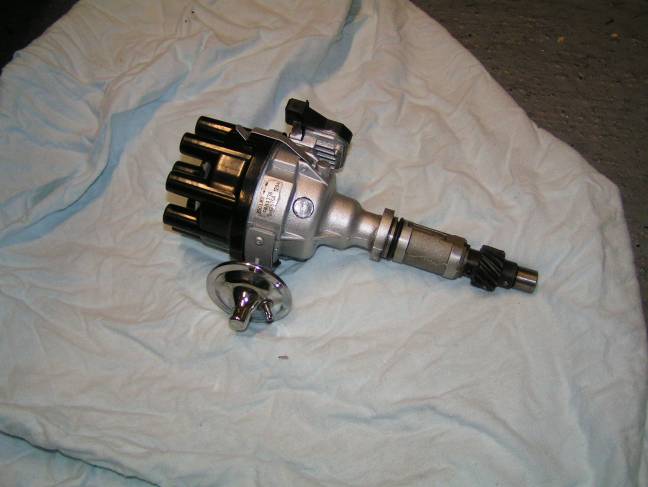
Distributor with new cap and rotor arm
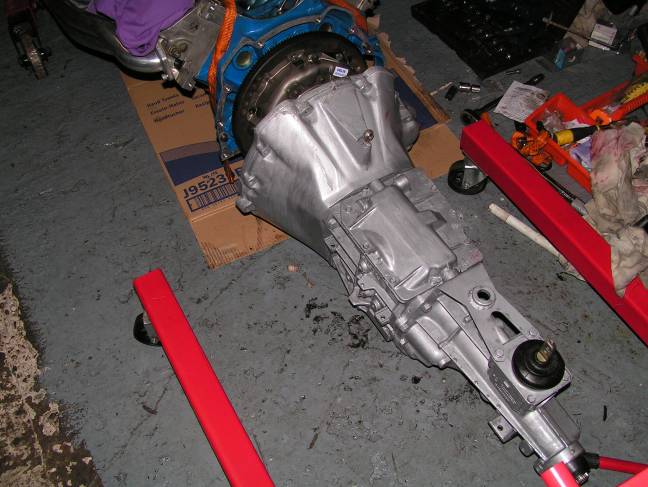
I
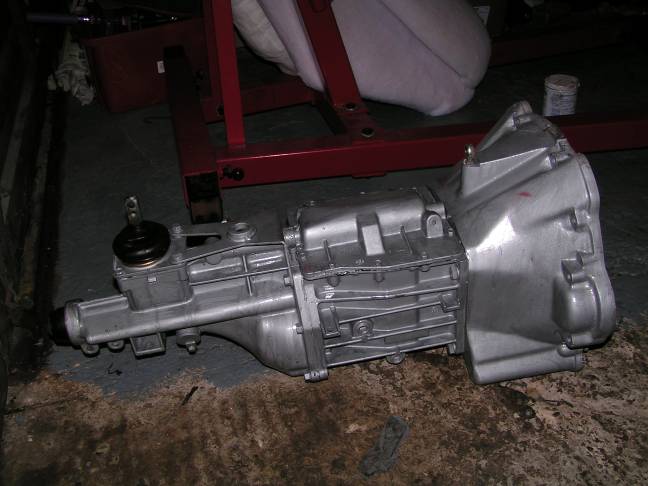
painted the rebuilt gearbox in silver and topped it with POR 15
Glistern clear lacquer; this should provide a durable and easy to wash
finish
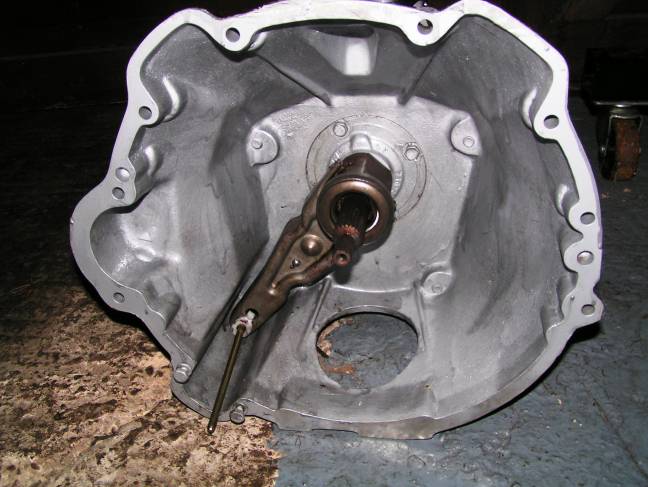
I fitted a complete new release arm and bearing assembly
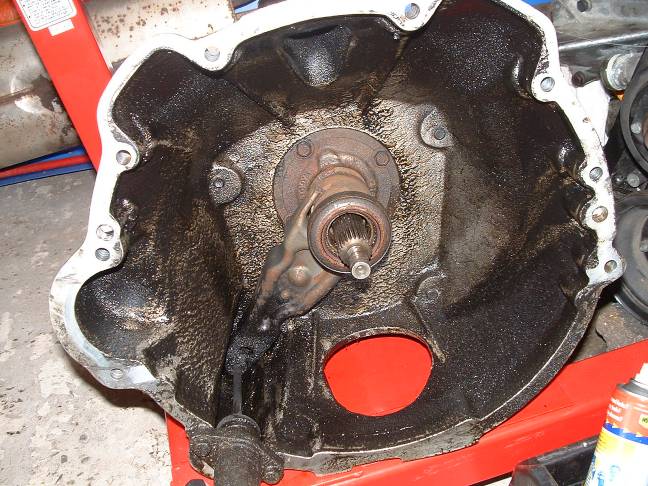
Here’s one of the same shot before the rebuild
Bottom pulley assembled with powder coated parts
It
was now time to start the engine strip and see what I was dealing
with. The engine was strong before removal without any poor
running problems, and with only a very slight tap from one of the
tappets when the engine was on over run after the throttle was blipped
and this noise only occurred when the oil was very warm. Why
rebuild then I hear you ask? Well the engine was out already
sooo…..
Removal of the rocker covers didn’t turn up any surprises
Removal of the heads and valley gasket also turned up no problems
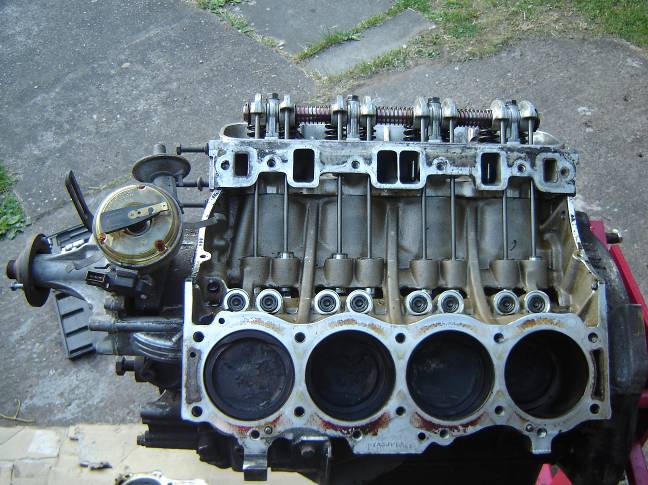
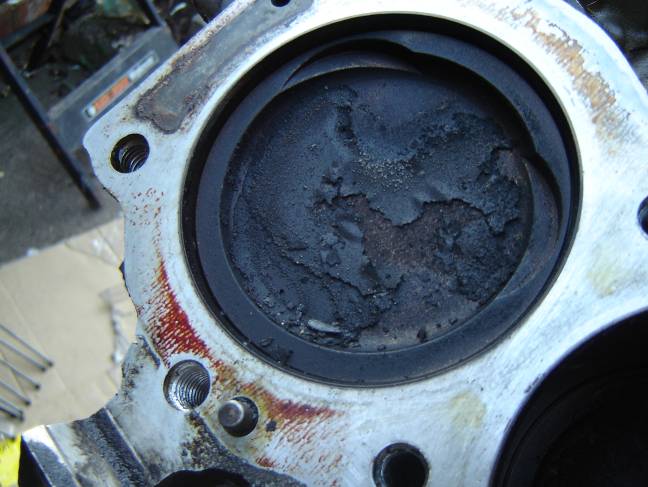
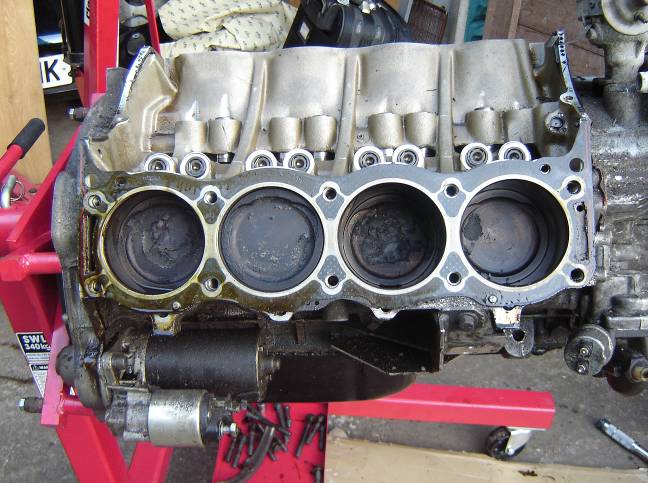
The
coke on the piston tops was lifting off; probably due to the amount of
time the engine was left standing before the strip commenced
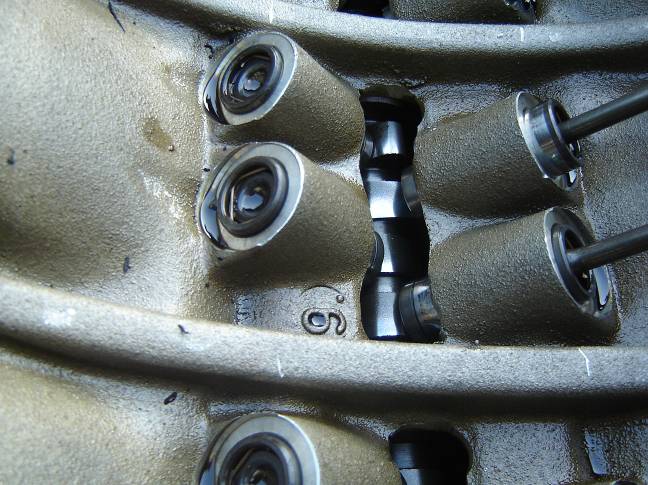
The cam didn’t show any obvious signs of wear after 40000miles
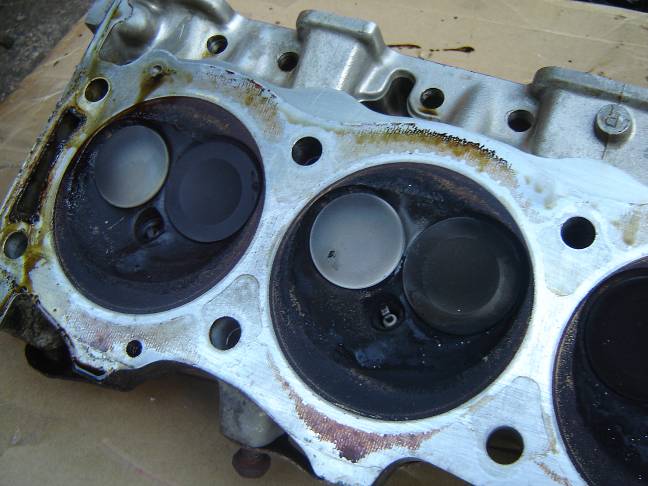
Combustion chambers turned up no surprises
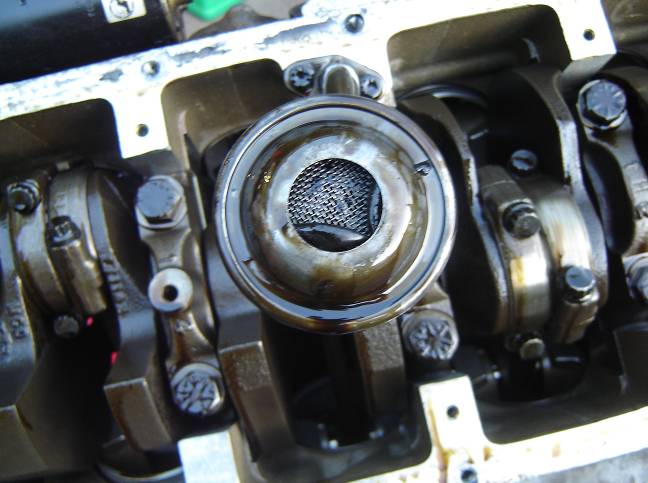
The
oil strainer had a fair bit of sealant in it, probably due to over
zealous use of the sump sealant. Fortunately this had no adverse
affect of the oil pressure
The
valley and the bottom end were looking quite clean, indicating regular
oil changes (backed up by service history), which is good news.
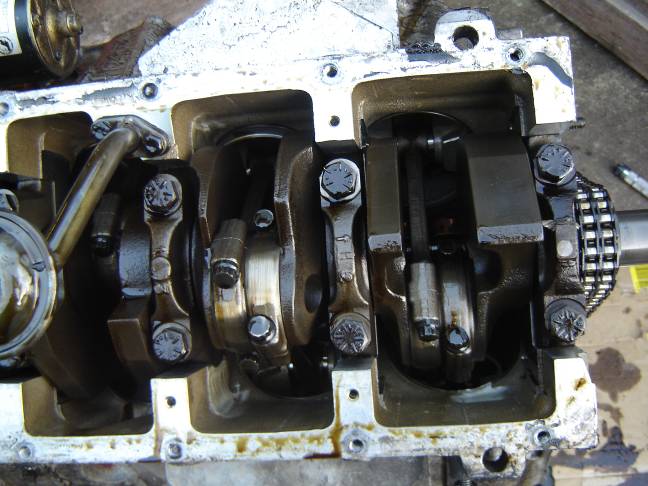
A bit of slack in the timing chain (annoyingly blurry though)
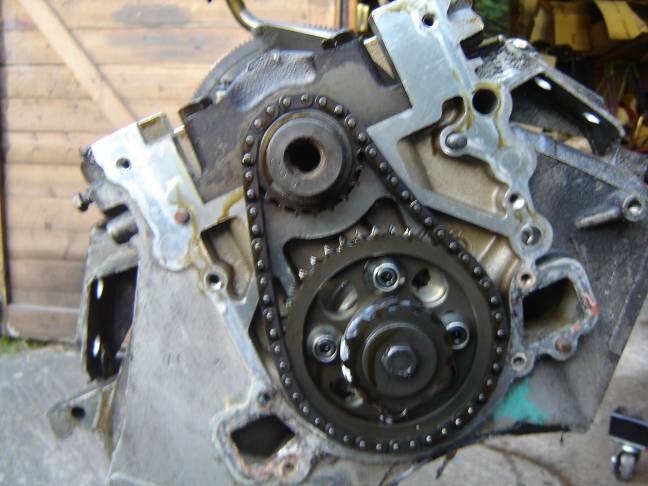
And wear on the teeth
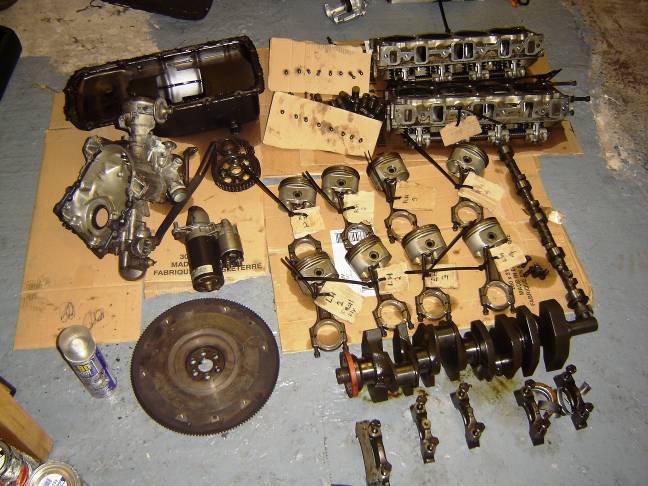
Ta daaa, one stripped engine!
I
cleaned the block up myself to start with; I did this with white
spirits, paint brushes and a jet washer. When I’d finished
washing it I poured hot water over the block to make the water
evaporate faster. I then droves all the excess moisture out with
an oil spray
I
then took the block along to my local machine shop for them to fit the
new cam bearings, hone the cylinder bores, and fit new core
plugs. After the machine work they chemically washed the block
I bought my engine rebuild parts from V8 Developments, I ordered the following items:
Full engine gasket set
H404 camshaft kit (includes cam, vernier timing gear, hydraulic cam followers, valve springs)
Big end and main bearings
Core plugs
Cam bearings
Piston rings
High torque clutch
Oil pump gears
Head bolts
Pushrods
The
cam choice was the only difficult decision during the engine rebuild, I
knew the H404 was as wild as I’d ever want to go but would it be too
wild. That I’d have to find out!!
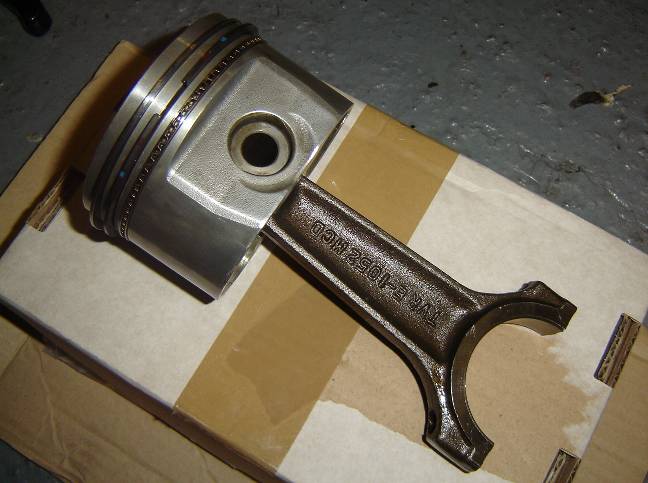
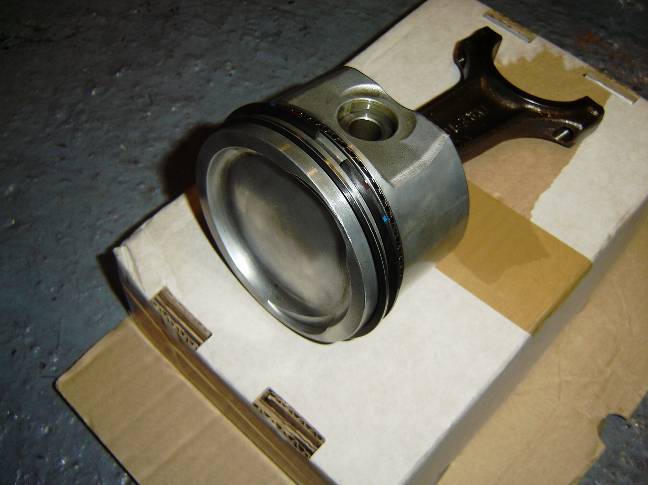
I polished the pistons up and fitted the new rings to them
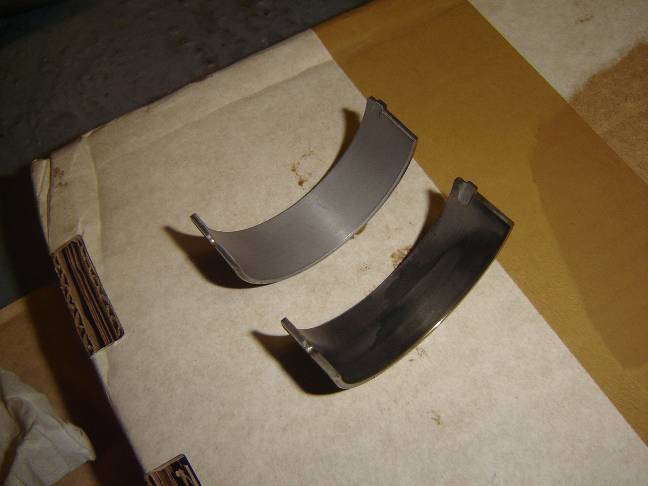
I then fitted the new big end bearings, the old ones were not bad but obviously showed signs of wear
To
ensure the bottom end stays together (touches wood) I bought a set of
ARP big end, main bolts and flywheel bolts, I also bought ARP stainless
manifold bolts to go with them.
Unfortunately the big end bolts were not the correct type, so I went to TVR power for some new original items.
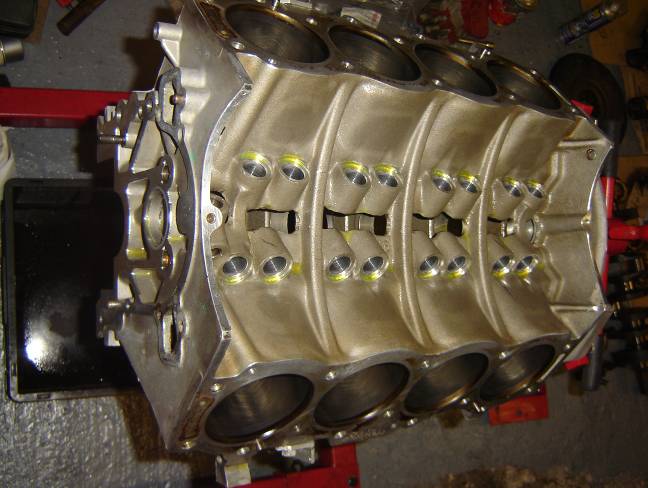
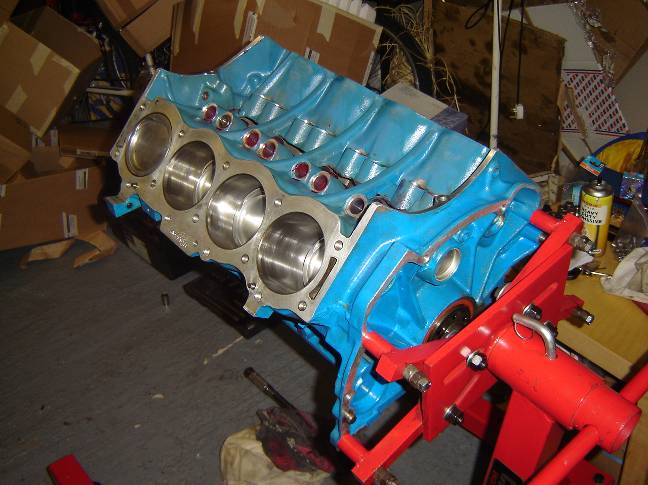
Once the block was back I painted it and started to assemble it
I
spent a weekend working on the cylinder heads, I cleaned them up then
decoked the valves. I also reshaped the valves a la Vizzard J and
the ground them in nicely. Then the new valve springs were
fitted. This took quite some time but it’s a job I find it quite
enjoyable J
The pre-cat on the one side was
totally loose in the manifold, I already intended to remove them but
this made sure I was going to have to do it. The loose one came
out without too much trouble but the other one was fixed in solidly,
this took quite a bit of persuasion to remove!
The
removal of the pre-cat won’t make a massive difference; it will mostly
be a noise thing. But what it will do is prevent them getting
blocked up and losing me power.
I sent the
manifold and Y piece away to Camcoat. They cleaned them up and coated
the manifolds internally with their highest spec (black) ceramic
coating; they then coated the manifold and the Y piece externally with
their ceramachrome coating. This looks great I sure you’ll agree
and hopefully will help reduce under bonnet temps
(Inlet manifold only resting in place in this photo)
Due to various horror stories about the standard aluminium rocker I decided to change them for a set of steel ones.
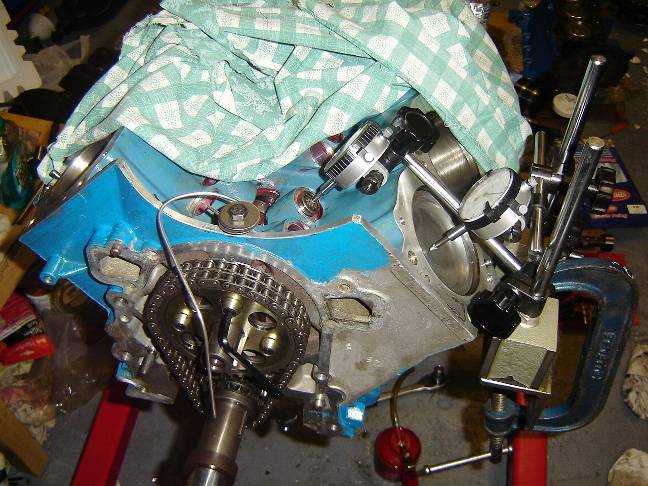
Before fitting the new rockers I timed in the cam on the new timing gear (timing wheel missing on this pic)
With the newly painted front cover on

After
the sump was fitted the engine was now nearly finished so it was time
to fit the new clutch. First the flywheel needed de-glazing then
clutch was aligned and torqued up.
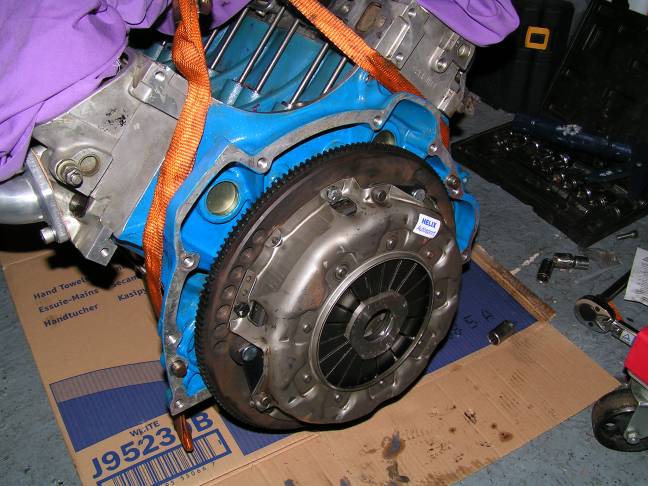
The gearbox was then mated to the engine
While
the engine was out I got hold of some heat resistant aluminium matting
and made some new engine bay heat shields. The new rivets are
stainless so won’t go rusty like the old ones
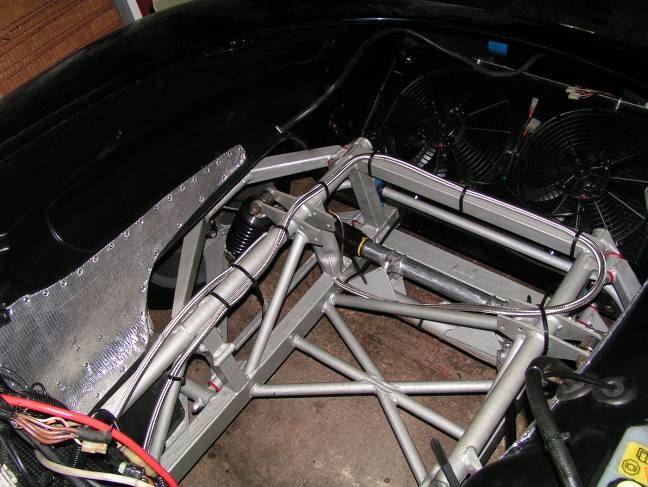

Looking a little better now than they did before!
Due
to working away and not being able to use my car regular a lot of
strain was put on the battery. I used to jump start the car every
two weeks when I was back home. This killed the battery, which
was not much cop anyway to be honest. So I decided to replace
it. Due to the nature of the engine (large capacity, relatively
high compression) it can take quite a lot of amps to crank it over
strongly. I spent a lot of time researching what would be the
best battery I could fit in the standard position.
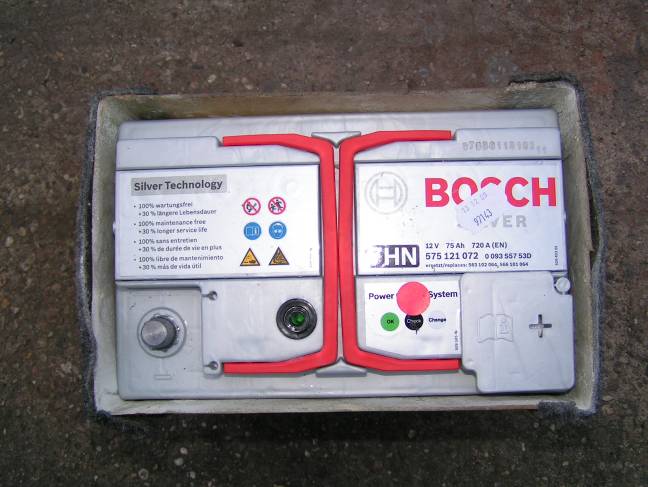
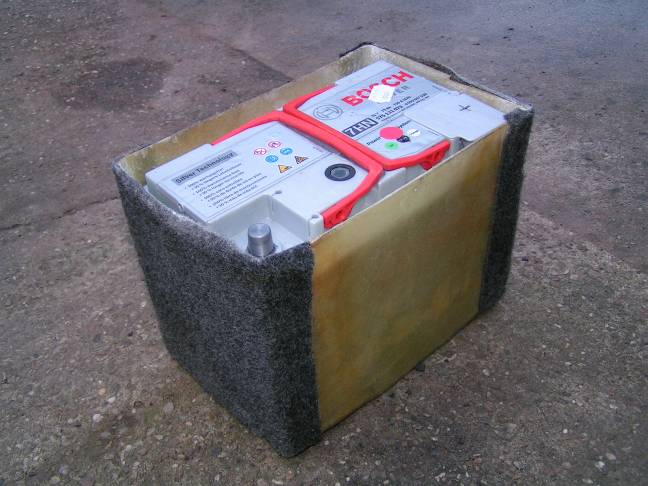
The
conclusion I (finally) came to was a 096 type Bosch Silver Star, these
batteries are supposed to be superb. The cold cranking amps on
this battery are 720amps! And it also puts out 75Ah as a bonus
(not that it’s needed on this car) The CCA sold it to me.
I
bought the battery from my local GSF (German Swedish French car parts)
for £55 after using a 10% discount card (from another car club).
To
fit the battery in to the standard box required the extra feet at the
side of the battery to be cut off (this is really easy being plastic)
and a bit of filing of the corners of the battery box. The
terminal are also the opposite way to standard, this is not a problem
on my car because the leads are long enough to reach. If it was a
problem I would have simply mounted the battery the other way around,
it is no trouble at all reaching over the battery to connect it.
I
have now tested the battery and found that it cranks VERY strongly, and
I have yet to add the Mod wise hot start kit I have bought for it!
It
was now time to add a few more bits to the engine, clean the wiring
loom up and drop the engine back in to the chassis. Actually
manoeuvring the engine and box in to the chassis was not too hard but
mating up the gear linkage and the engine mounts was a real pain.
It should not be too difficult but for some reason it was, you win some
you lose some L
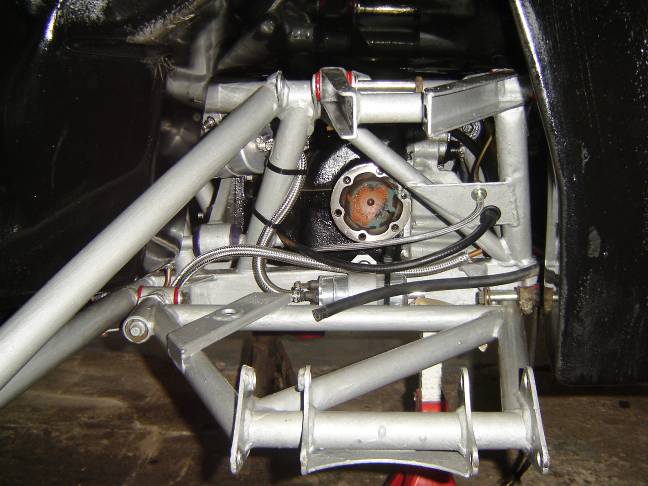
The
next step was to fit the propshaft (cleaned and greased) install the
exhaust. This took a while; the rear mount on the exhaust was no
where near where it should have been so I had to fabricate an adaptor
for it.
The gearbox was then filled with Silkolene fully synthetic after getting advice from an oil expert.
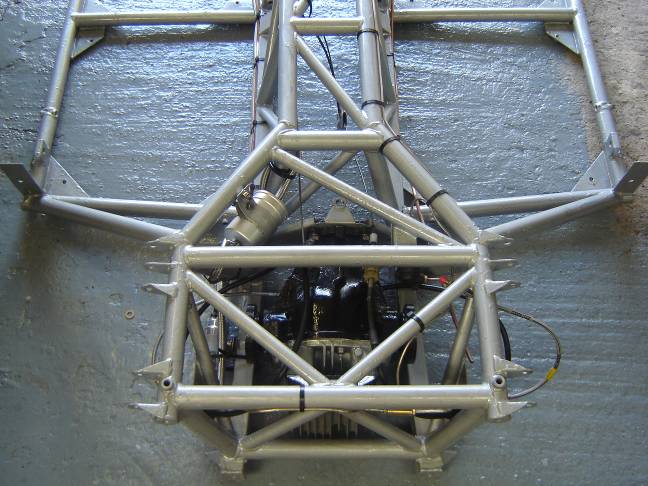
After
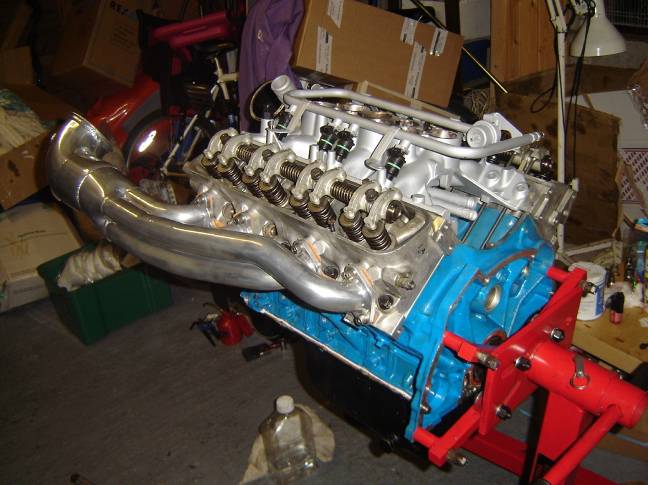
adding a few more shiny bits to the engine it was really starting to
come together and I was starting to see the finish line J
And now complete as per when I ran it up

The
engine started second attempt after swinging the dizzy a few
degrees. It sounds bloody marvellous J it’s a great feeling
having completely built this beast with my own hands J
The
idle is a little lumpy due to the cam but I haven’t had chance to drive
it yet to find out have bad it is. I will be in need of a remap
shortly which will help smooth the low speed running a little.
I’m
looking to go to fully mappable fuel and ignition in the near future, I
have built a Megasquirt ECU ready to go on to another car of mine and I
think I may take this route with this car as well.
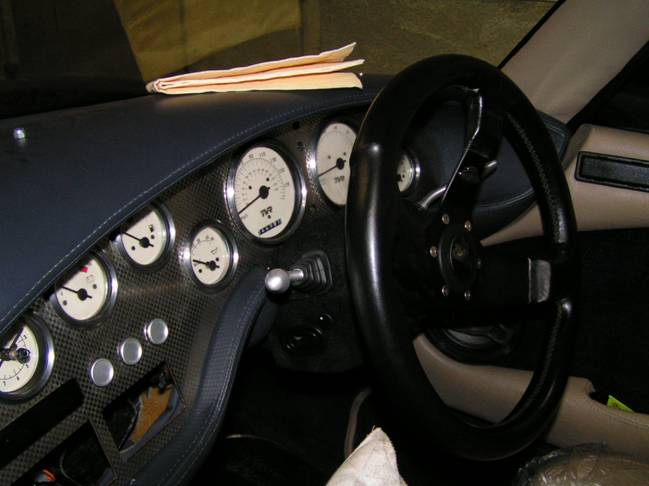
I have also changed the dashboard for a Leven stainless item (along with all the other bit you have to but when you do this)
Whilst
doing the dash I wet and dried all of the black paint off the dial
surround, the now low massively better and more modern than before.
Dashboard before
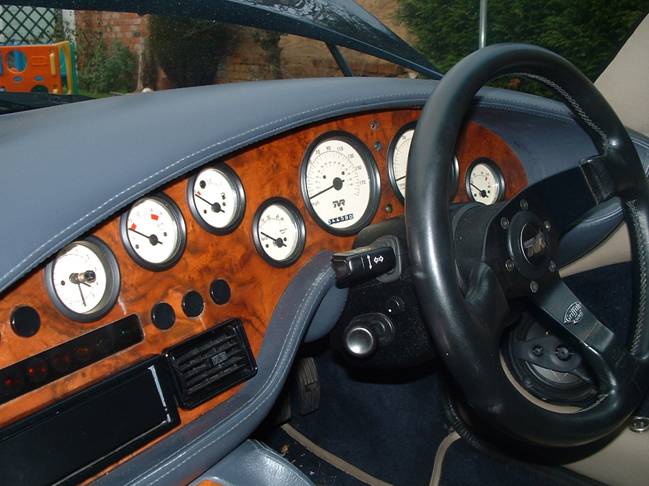
Sorry about the dreadful picture (updating soon, it looks a lot better in real life)
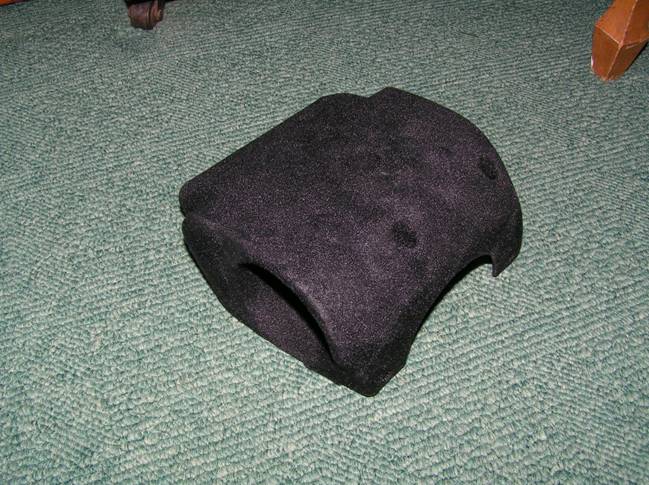
Also notice the column cowl in the above picture has a flocked (I said flocked J ) finish now
Flocked cowl
Kontaktaufnahme mit dem Autor und weitere Informationen über info@acs-pro.de
|
